
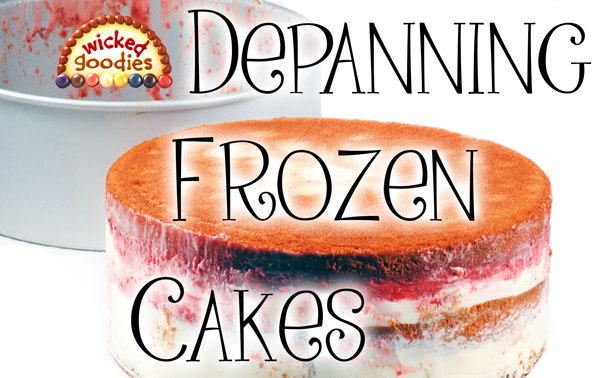
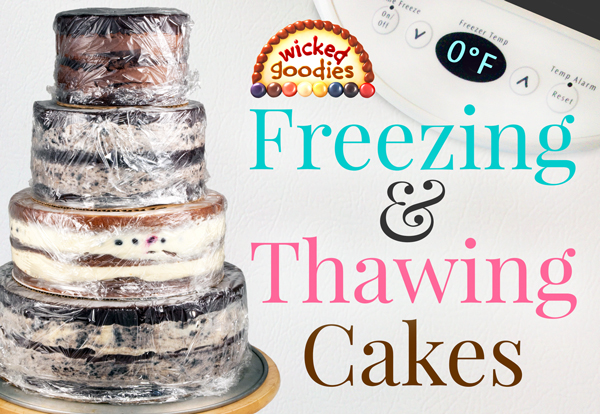
This is a lengthy multi-video tutorial with step-by-step instructions on how to fill and freeze layer cakes within the baking pan, a professional bakery method for the torting phase of assembly. To best understand this concept, I recommend watching the first two videos and reading all the way to the bottom of this page. You might also want to check out this tutorial as well: How to Freeze and Thaw Cakes.
VIDEO #1: The Virtues of Freezing
VIDEO #2: Step-by-Step Filling & Depanning
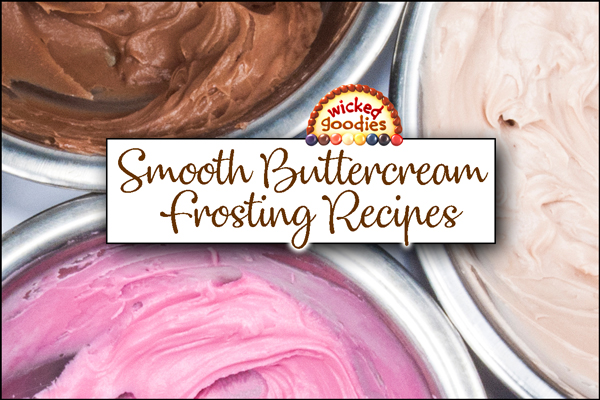
Pro Cake Filling Basics
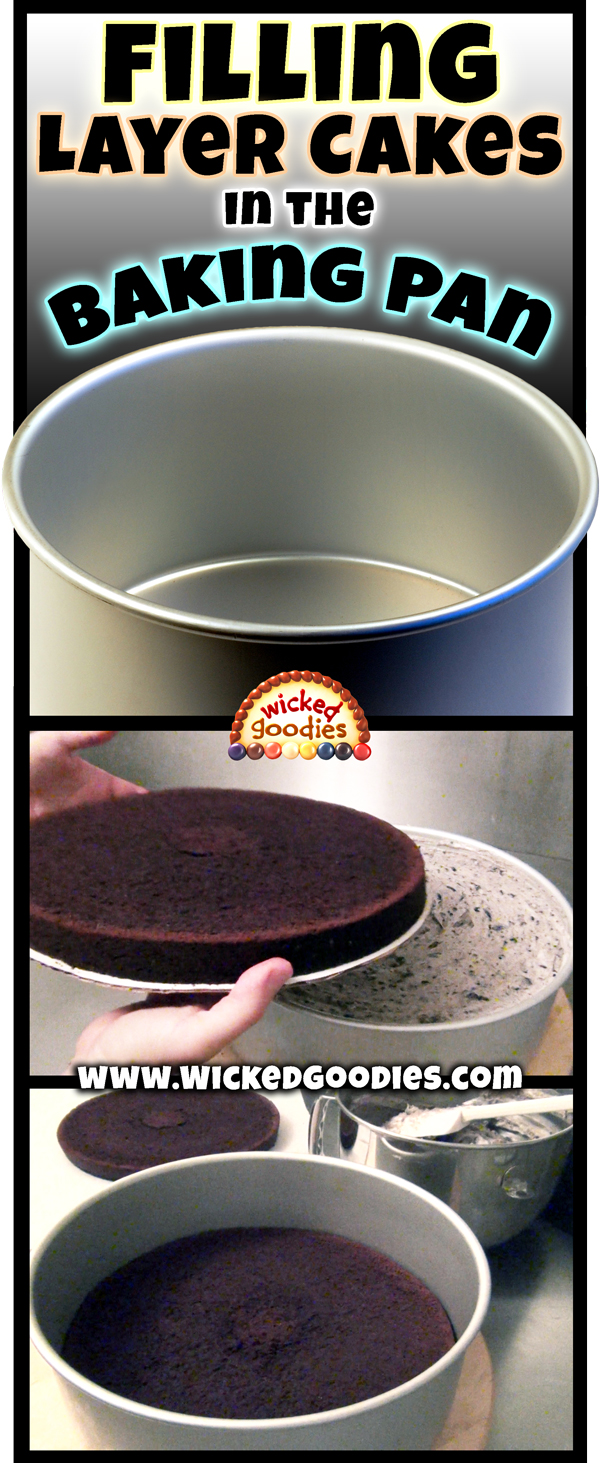
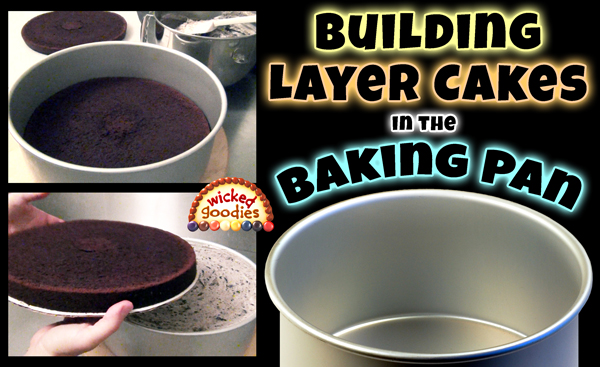
In commercial bakeries, we have a way of building layer cakes in the pan so they come out clean and symmetrical in the shape of cylinders, squares, rectangles, etc. In my experience, this method is the best for building cakes, particularly sculpted cake designs, stacked cakes and wedding cake designs.
The trick is to stack the sliced cake layers + filling layers together in the same pan that was used for baking. The pan then doubles as both a baking vessel and a mold for assembling the cake.
Once the cake gets assembled inside the pan, it must be frozen before it’s ready to be popped out.
When done right, this method yields a solid, stable geometrical shaped cake. Such a cake is easier to frost and requires far less buttercream to achieve a professional-looking finish since there are fewer holes and uneven spots to patch.

This technique works great for filling one cake at home. It’s equally effective for filling hundreds cakes in a high volume commercial bakery operation. In bakeries big and small, I’ve encountered this method. Almost all of my cakes featured on this site were built this way.
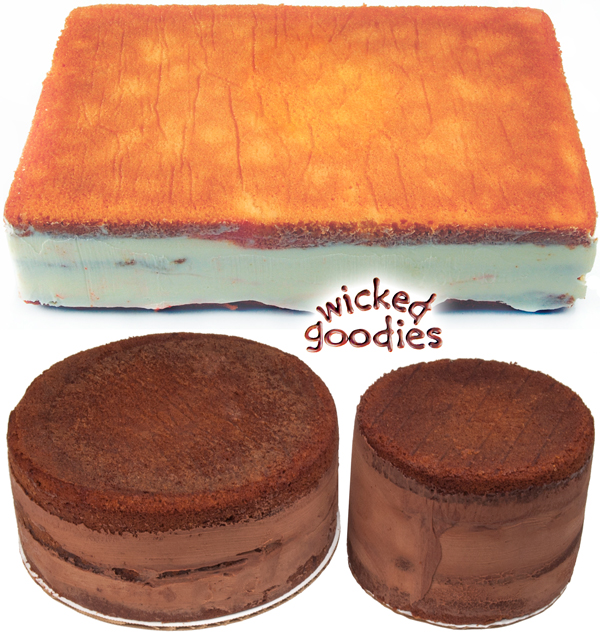
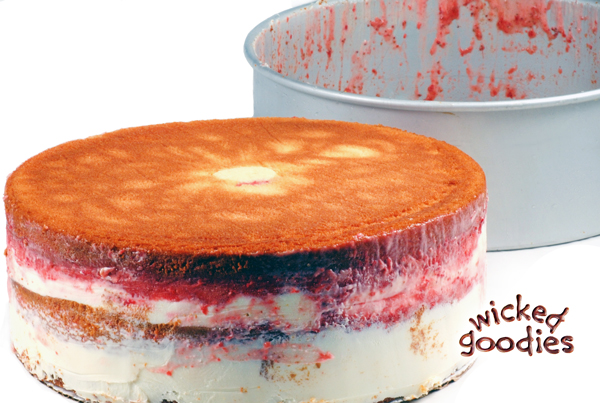
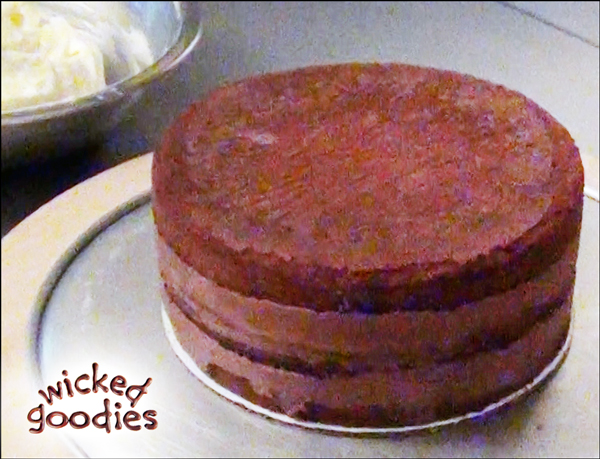
Cross Section of Cakes Filled Using This Method
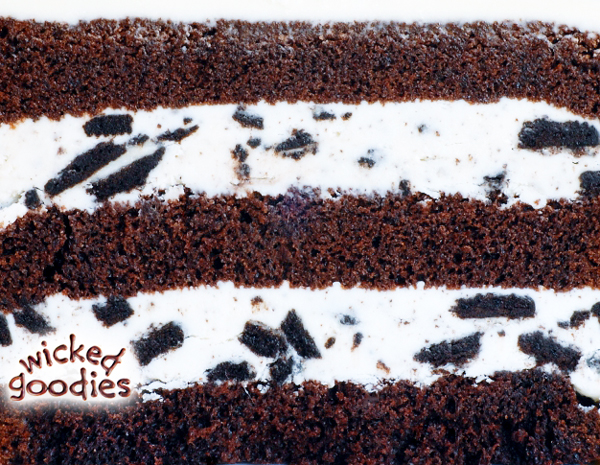
Here are some cutaway views of a cookies and cream cake that I assembled in the pan using this filling method. Note how tightly the layers are fused together. There are no air gaps in the cake. Cookies and Cream is one of 11 Reliable Cake Filling Flavors from my Streamlined Cake Menu.

Step-by-Step Instructions
Here are step-by-step instructions on how to execute this method including tips on how to make it work with any sized pan.
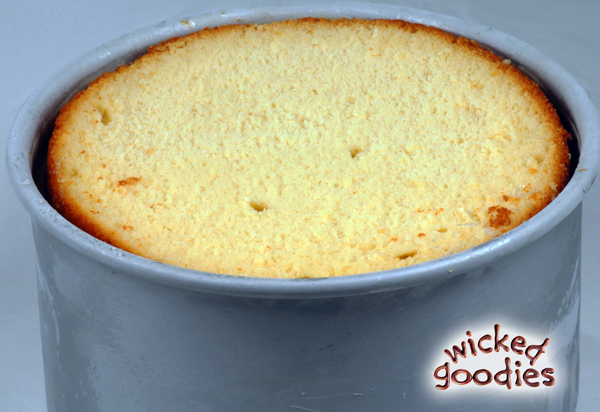
Step #1 – Bake
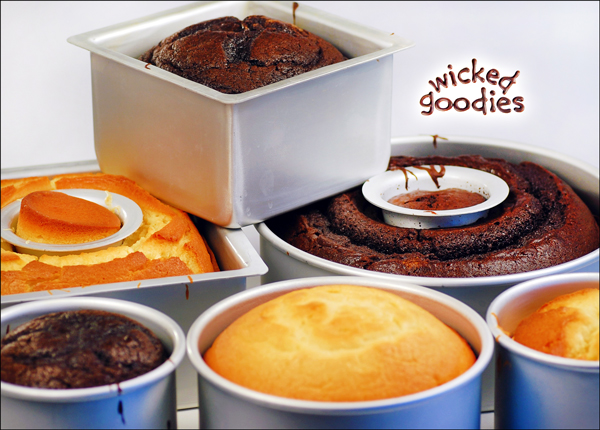
Bake one or more cakes and allow them to cool. I like to bake 3-4” deep cakes in 3-4” deep cake pans. To ensure even baking of larger cake tiers (8”+ diameter), I use a heating core or heating rod (commission earned).
Step #2 – Prep the Fillings
 While the cakes are baking and cooling, it’s a good time to prep the fillings. If you don’t already have stable cake filling favorites of your own, here are 11 Layer Cake Filling Flavors that have performed well for me. As part of a Streamlined Cake Menu designed for production efficiency, they are all based on two buttercream frosting recipes.
Step #3 – Slice the Cake Layers
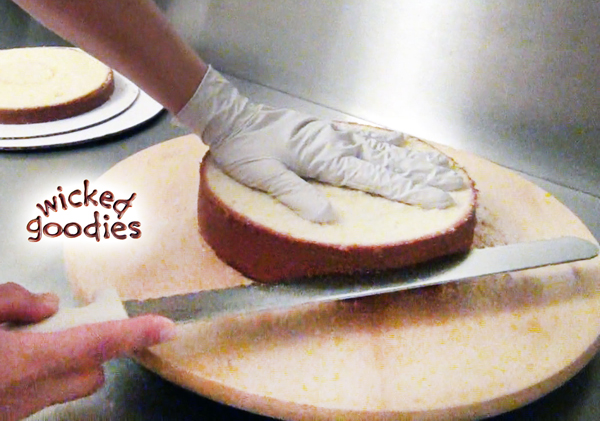
Once the cakes are cool, slice them into layers using a long serrated bread knife (commission earned). I typically aim for three or four 1” thick layers per cake tier. Follow this link to watch my cake slicing video tutorial.
Step #4 – Prep the Pan
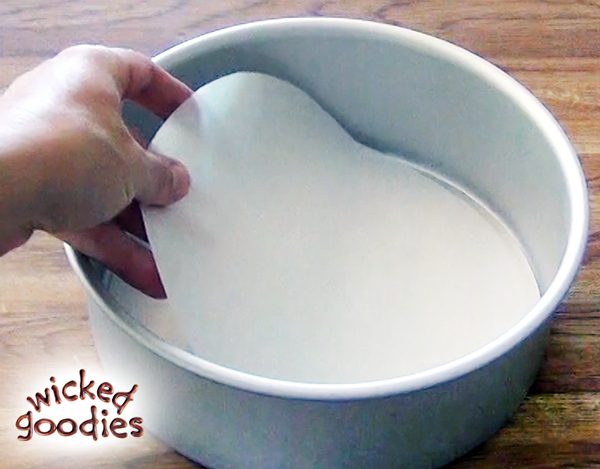
Since you will be re-using the baking pan as a vessel for assembling the cake, you don’t need to wash it. However you do need something to prevent the cake from sticking on the bottom. I typically start building my layers with the slice of cake that already has the pan liner stuck to its bottom. That way, it gets re-used.
If you didn’t use a pan liner for baking or already peeled it off the cake, be sure to add a fresh one to the bottom of the pan.
Cake Collar Option
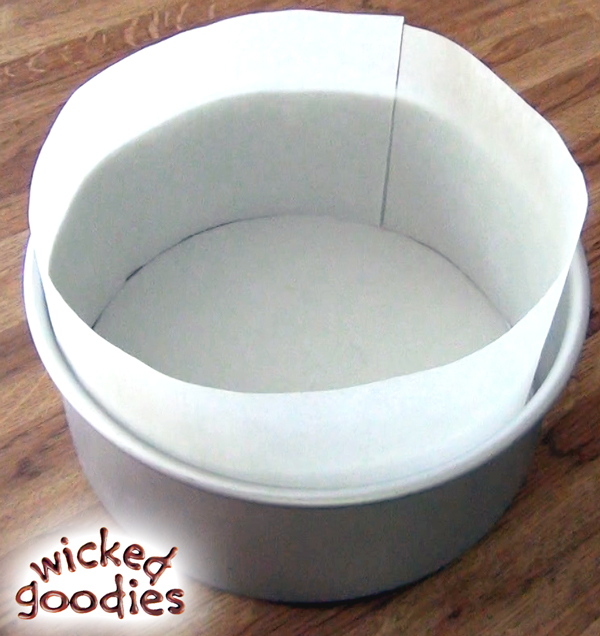
If you want to play it extra safe, you can also add a parchment paper collar around the inside walls of the pan too. However it’s not necessary. The collar is an optional step that may be used to extend the height of the pan when needed, such as when the pan is squatter than the cake you intend to build or in cases. If you happen to own two squat pans, you may invert one over the other to make a ‘pan sandwich’ with the filled cake in between. This works almost just as effectively as one deep pan.
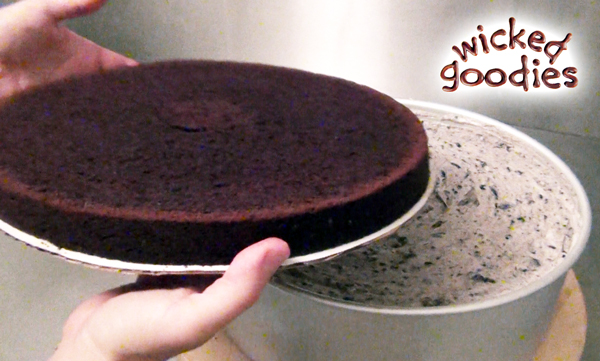
Step #5 – Build the Cake INSIDE the Pan
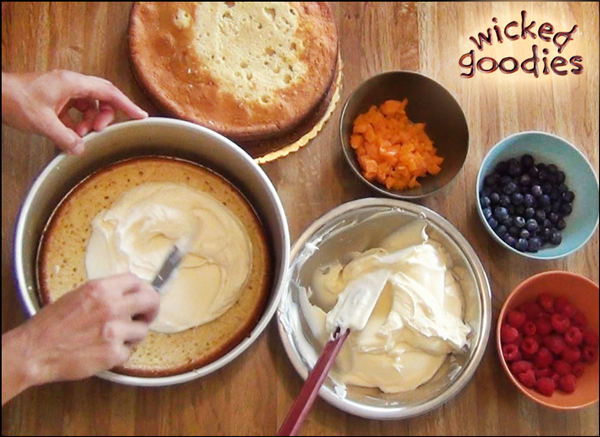
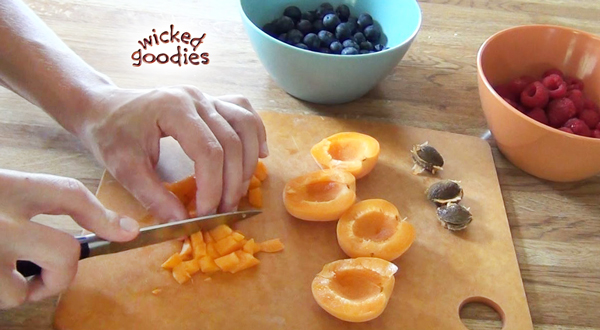
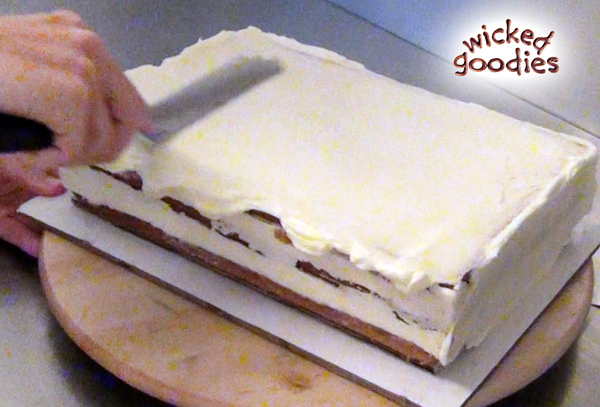
Here is an example of how to build a cake inside the baking pan using my summer fruit cake filling. The graphic below provides a cutaway view of what I built inside the pan.
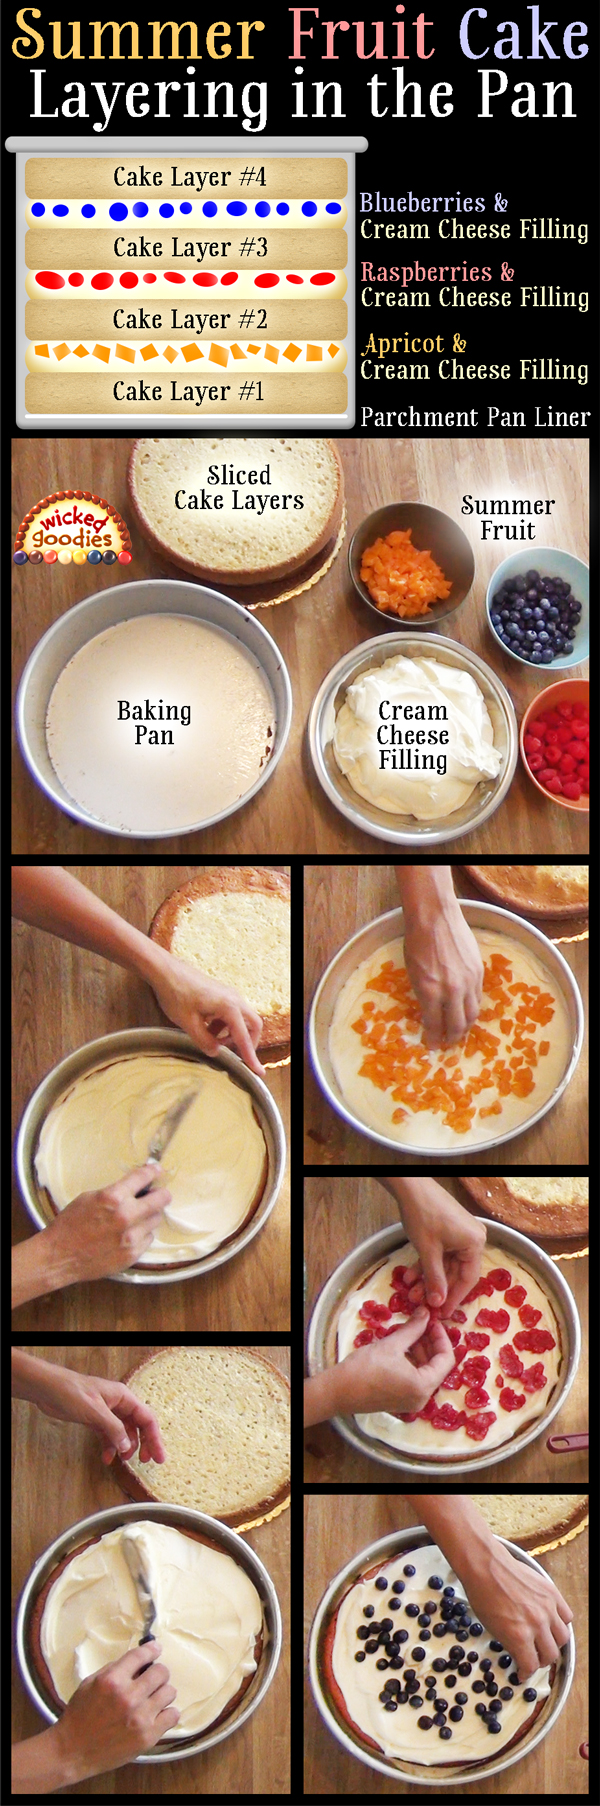
Since whole chunks of fruit were involved in the building of this cake, I concentrated the filling layers in the center so there would be room for them to spread when I pushed down on the top of the assembled cake (see step #6). That way, the fruit, filling and cake could all fuse together into a solid cylinder shape.
Step #6 – Push
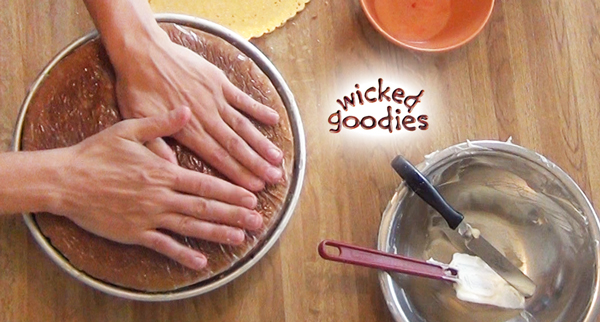
Once the final layer of cake has been added on top, press down on it to push the filling layers together and force out any air pockets trapped within. You will probably hear some air hiss out.
For large cake tiers (10″ or wider in diameter), I push with a cake cardboard, which distributes weight more evenly than my hands.
Step #7 – Seal
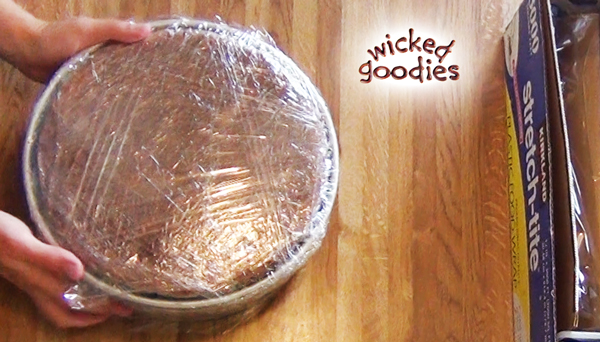
Wrap the whole cake (still within the pan) in a double layer of cling film. Pull the film all the way around the top, bottom and sides of the pan so it is completely sealed.
Step #8 – Freeze

Freeze the cake (still within the pan) overnight. Note that with very few exceptions, freezing a cake for this amount of time does not affect the quality of a cake. In fact, you can freeze a cake weeks in advance of the event if that works better for your cake planning schedule. Just be sure to follow my tips on how to freeze a cake in the pan.
NOTE: The cake must be frozen in order to yield favorable results. If it’s not cold enough, there’s a chance it might not come out of the pan all in one piece. If that occurs, press it back into the pan, freeze it some more, then try again later.
How long it takes to freeze a cake to the point of readiness depends on the size of the cake and the efficiency of your freezer. The larger the cake, the longer it will take to fully freeze. A good rule of thumb is to freeze the cake for 24-48 hours before depanning it. It is possible to execute this method in a shorter space of time but it will not be as easy to get the cake out of the pan.
Step #9 – Depan
Once the cake is frozen, it may be unwrapped and popped out of the pan.
There are a number of ways to remove a frozen cake from its baking pan. Below, I’ve listed four of them. Please feel free to use the method that is most comfortable for you.
4 Ways to Remove a Frozen Cake from the Pan
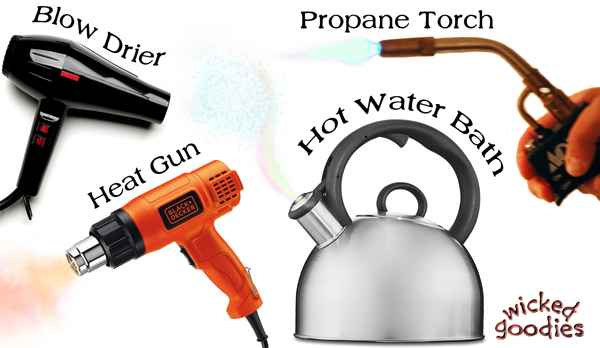 Hot Water Bath Method
The hot water bath method involves submerging the frozen pan partway into a larger vessel half-full of simmering water. This is the traditional way to de-mold desserts, the only caveat being that you need to find a vessel big enough to accommodate your pan. For larger cake tiers, this may prove difficult.
At one of the wholesale bakeries where I was employed, we produced a high volume of 7″ – 10″ cakes. In that kitchen, we used the hot water bath method with a 12″ diameter deep sauce pan set atop a portable propane burner with the flame set to low. The flame kept the water hot for hours while racks of cakes were de-panned. I didn’t love how the water made the work station wet and messy but it was an economical and efficient method for depanning 50-100 cakes per day.
Heat Gun Method
Brenda Broadway, a reader from BB Bakes Sugar Art, has reported success using a heat gun in place of the blow torch method listed below. She’s written a summary of her findings here: The Perfect Cake Hack. Although I haven’t tried it myself, I suspect this may be the ideal method as a heat gun is safer than a blow torch.
Blow Drier Method
Another reader of this blog has reported success using a hair drier in place of the torch method listed below. I would only opt for a hair drier as a last resort since it would heat up the temperature of the kitchen and blow dust and debris around. As a bathroom item, it’s also not the most sanitary choice. However it’s an option you may consider if you don’t own a heat gun, torch, or vessel big enough to make a hot water bath.
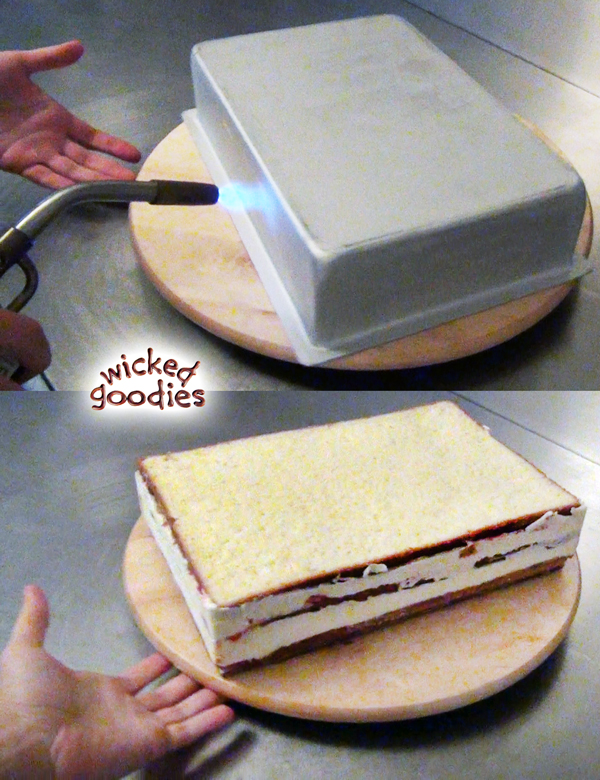
Blow Torch Method
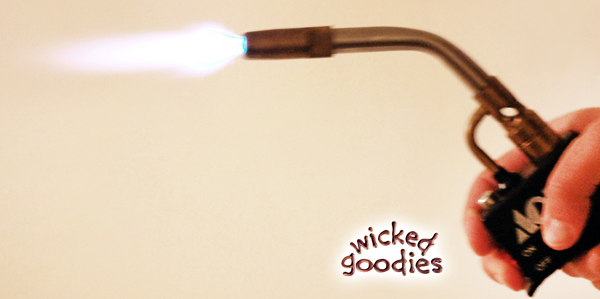
My preferred method is the blow torch because it’s quick, easy and doesn’t involve water. Moreover, this is how I was taught in a kitchen where we relied on a blow torch for several different pastry techniques.
The torch method may be used on any size or shaped pan so it comes in especially handy when dealing with the larger tiers of a wedding cake.
Step-by-Step Instructions
1. Invert the cake in its pan and place it on a turntable.
2. Spin the wheel slowly with one hand while torching the outside of the pan with the other. Keep the flame moving to avoid overheating the pan. Do this for 5 seconds for a small cake (4” – 9” diameter) or 10 seconds for a large cake (10” or wider).
3. Stop and touch the outside of the pan; it should feel a little warm all around. The warmth of the pan will soften the sides of the cake, releasing its hold on the metal.
4. Flip the pan so that the cake is face up. Do not delay at this stage as the warmth you’ve created will quickly dissipate, causing the sides of the cake to once again freeze against the pan.
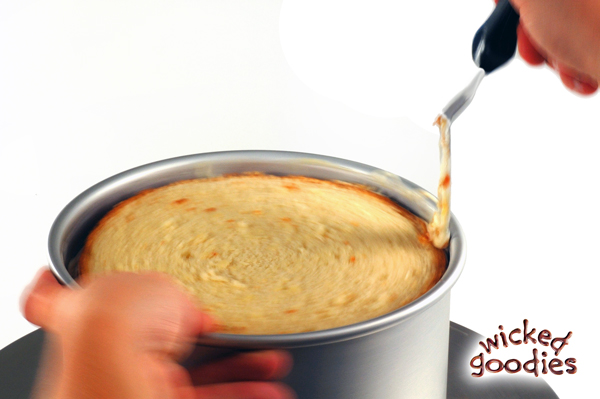
5. Run a small offset spatula around the outside of the cake to release the filling that likely has a suction hold on the pan’s sides.
6. Invert the pan and shake it in mid-air until the cake falls out. Be patient. It can take time for the cake to work its way out. You’ll know it’s working when you hear a sucking sound. Some forceful jiggling helps.
If the cake won’t release, repeat steps 4 and 5.
The end result should be a cold cake in the exact shape of the pan.
Step #10 – Slack Off
Slacking Off is the industry term for defrosting food gradually in the refrigerator. I don’t recommend defrosting a frozen cake at room temperature. That will defeat the purpose of chilling the cake and result in excess condensation forming on its surface. Moreover, it is not a food safe option.
Depending on the size of the cake, the time it takes to transition from a frozen state to a refrigerator-temperature state could take anywhere between 4-24 hours. Be sure to take that under consideration when experimenting with this method.
While the cake is still frozen or semi-frozen, I like to carve it (if it’s a sculpted cake) and add a crumb coat of buttercream frosting. I find it’s easier to accomplish these tasks while the cake is extra cold because then it’s easier to handle. Follow this link for more information about timing.
Cake Timing and Scheduling
ADDITIONAL TIPS & TRICKS
TIP: Push Fillings to the Edge of the Pan

Spreading the cake fillings to the edges of the pan creates nice even layers without any gaps in between. This helps prevent air pockets from getting trapped inside the cake, which minimizes the chance of bulging fillings. It also makes cakes easier to frost.
TRICK: Use a Cake Collar to Make Tall Cakes
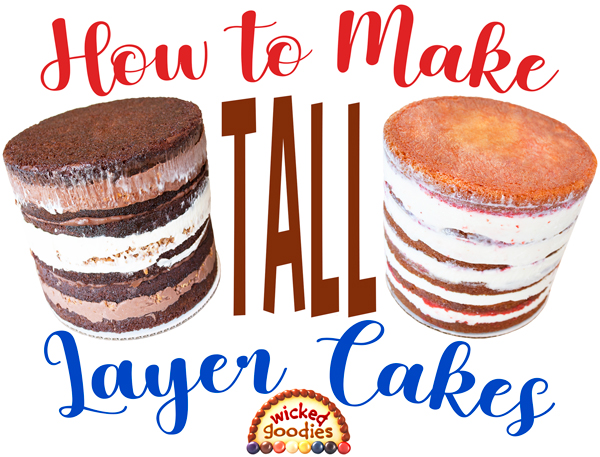
If you need to build a cake that is taller than the height of your pan or if you want to be able to execute this method using squat pans (such as 2″ deep pans), here is the solution: How to Make Tall Layer Cakes.
TIP: Suitable Fillings for This Method
 Follow this link to explore the concept of a Streamlined Cake Menu including 11 Stable Layer Cake Filling Recipes.
TRICK: The Bent Spoon Hack
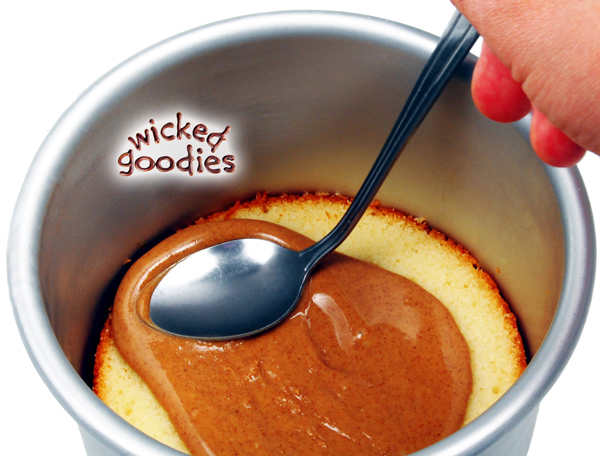
To spread filling in smaller cake pans where an offset spatula can’t reach, try using a bent fountain soda spoon.
TIP: Recommended Cake Pans for This Method
 Follow this link to explore the best options for cake baking pans that double as molds for layer cake making.

New to Wicked Goodies? Start *HERE*


Hi! If planning to fill a cake that is taller than the pan, what are the steps to doing the second pan upside down over it? How do you get it over the cake and press out the air if it doesn’t go all the way to the top? I’m worried if I try a parchment collar it won’t hold the same shape/diameter. Any details on this process would be great!! I’ve done it once within one pan and LOVE this technique. Thanks!
Lisa,
Good question. I recommend checking out the comment below from Lisa Gimm, who shared a smart trick for creating a collar to extend the height of a pan. In her case, she cut a strip from the sides of a round ice cream bucket. It gets me to thinking about all the different kinds of round food containers you could use to make DIY collars. The container wouldn’t even have to be the same diameter as the pan as long as it’s flexible enough to be pulled into a round collar shape. Tape would hold it together and the result would be sturdier than parchment, wax paper and acetate. Another perk is that you can reuse it.
As for inverting the second pan over the first, it’s not the ideal solution but it will work in a pinch if the cake does not extend that far above the lip of the bottom pan. The trick is to start out building the cake within a parchment or acetate collar. As soon as your layers are in place, invert the second pan over that for added support. Push down very slowly so the air can escape out the sides. Seal the whole thing in plastic wrap so the pans don’t slip apart. The top surface of the cake may end up a little uneven since there is nothing holding it down. That’s okay since it can be trimmed/leveled later on.
Great! I’ll try those tips. I also found your tall cake section (of course right after commenting ) and saw someone used a cheap plastic placemat, as well. Those both sound like sturdier options, so I’m feeling more comfortable leading up to the process I’m excited! Love this technique and never going back! Haha
Tried this technique for the first time last week, and it was AMAZING! I will have to back to hand stacking caked! So much simpler, quicker, and straighter!
Thanks for sharing such a great method!
Lisa,
That is fantastic news. Thanks for the feedback!
I’m in the process of trying this method for the first time. Making a double barrel 8” cake. Both tiers are in the freezer now filled in pans and wrapped in plastic wrap. I need to travel over an hour the day before the event (evening event). Should I depan and Saran Wrap the cakes and travel with them in a cooler and frost and assemble the morning of the event? Or would it be better to fully frost them and transport them assembled? Thanks for these tutorials!
I would not wait until the last minute to frost. The more you can do in advance, the better.
I can’t make a reliable recommendation with this much information. There are too many other variables involved with making a decision like this. The quality of the delivery vehicle, quality of the roads, temperature/climate, height of the cake, composition of the cake, and infrastructure all must be factored in. I cover all the logistics of cake delivery/assembly here: Cake Delivery
Hello! My question is regarding the use of jams/other non-buttercream based fillings. If you put the jam on the cake layer first, would this not soak into the cake layer underneath, making it soggy? Should one use a really thick jam/other filling? I’ve read that I should put down a thin layer of buttercream before any fruit-type filling to avoid this. is this not necessary? Also, is there any way to get a thicker layer of fruit filling without compromising the integrity of the cake? I ask because it seems like every time I’ve had a cake like this, there didn’t seem to be much ‘filling’ in these layers. :/ I sincerely thank you for your time. I can’t tell you how much your information has helped! Thanks for taking the time to teach!
I don’t advise adding a thick layer of jam. Jam is rather runny. Too much of it leads to an unstable cake. I also don’t recommend putting jam between layers of buttercream. They resist one another so that could also cause slippage.
You are correct that a jam filling alone is rather skimpy. See this strawberry filling recipe as the concept is similar to what you describe. I recommend putting wet/slippery fillings against a cake layer so they soak in. It maximizes stability. It also helps moisten the cake. I wouldn’t worry about sogginess. Moist cake is ideal!
If you want a nice thick layer of jam/jelly, you can use gelatin to stabilize it. The texture will be more firm. However then you would achieve the look you are going for.
Hi! I’ve reading your tips and watching your videos! They’re great! Thanks for sharing! I bought your transporting cake book as I’m making my first wedding cake for a wedding that’s coming up in two weeks, I’m planning to follow all your directions, including filling and freezing the cakes before icing, as I have to drive 8 miles to the wedding and I want it to be really stable for the trip. I’m making a trail two tier cake this week, for the trail cake, I’m thinking of making the top tier a checkerboard cake. I was wondering, can you stack a checker-board cake? Would the dowels still work? It’s probably going to be an 8inch tall, 6 inch wide round cake on a 6-7 inch tall and 8 inch wide cake. What do you think? Thanks!
I’ve never made a checkerboard cake…so I couldn’t say for sure. I suppose it depends on the moistness of the cake. As long as all the cubes fuse together, the tiers should be stable enough to stack.
Hi, I have a question about fillings, have you ever used some kind of Bavarian cream or Natilla as a filling and then freeze it, do you think I. An freeze a cake with Natilla as a filling?? Thank you so much!
Bavarian is one exception – that must never be frozen.
Nutella can be frozen – that will be fine.
Oooh ok Bavarian never, maybe there was a misunderstood, Natilla in Spanish (sorry) is something like a pastry cream, can I freeze pastry cream? Thank you in advance!!.
Yes I did misunderstand – I thought you had misspelled Nutella. Pastry cream and any variant of it may be frozen.
Perfect!!! Thank you so so much!!!
I am SO grateful to you for this info! I had a wedding cake to do and needed to make sure my tiers were stacked straight. I must say I was skeptical but it was fantastic! I only had 2″ pans but instead of using acetate ( which I didn’t have) I cut apart a gallon. Ice cream bucket, cut a strip 3 1/2″ wide and used the whole length. One was great for the 6″ & 8″. I put 2 together for the larger cakes! It was like magic! I will never stack my cakes again without using this method!, THANK YOU!
Linda, That’s a brilliant idea with the ice cream bucket! Thank you for sharing it here. I am so happy you had success with this method.
How did you secure the bucket? What kind of bucket exactly?
What are the best cake recipes to use? It seems like the cakes recipes I find are all so soft they don’t hold up. And I get bulging horribly :(. Thank you for all your wonderful information!
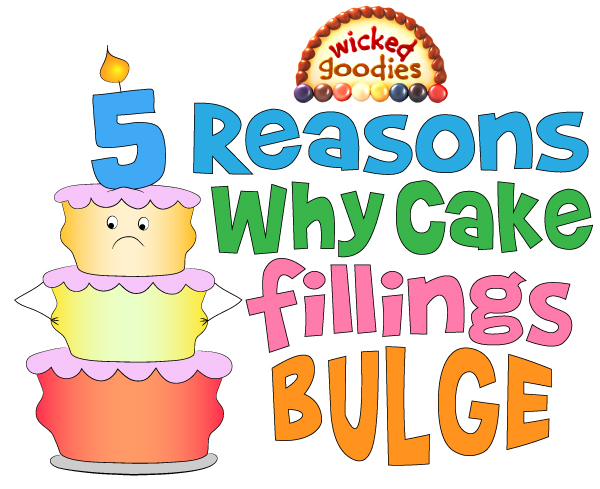
That’s a lovely cake! I am working on a video that addresses the issue of bulging fillings. It is not related to the choice of cake recipe. It is related to the choice of filling recipes and the filling technique. Stay tuned for my future video on this topic.
I’m doing a naked cake as a favour for a friend, I’ve watched your tutorial on stacking and filling the cake in the pan which I think is brilliant and I am definitely going to try it. If I do the base as a 10 inch in a 3iinch pan will I need to do 2 and then stick them together to make it deep enough
When you say “do” do you mean bake? If so, you can use a heating core to achieve a deep enough cake to bake it only once. If you don’t own a heating core, then you might need to bake two rounds of cake if you want it to be a tall cake.
Sorry, yes I mean bake, I am going to purchase a heating core as you suggest but if I have a 3 inch deep tin will that be tall enough for the base of a wedding cake . many thanks
If you want to make the cake taller than 3″ then you can extend the height of the pan with a cake collar.
Thank you for your time and helpful replies. I have purchased two of your books and think they are brilliant.
Thank you for buying my books! Your patronage helps this site go-round 🙂
Hi
Thank you very much for your site and the great ideas that you are sharing!
Just a question on the cake filling method – will it work with a springform pan?
Yes – it should. I recommend lining the sides of the springform with parchment or wax paper so that the filling doesn’t pull away when you release the clasp.
I just found your site. I’m pretty much self taught and while researching sharp corner frosting I came across a suggestion to build cakes in a cake ring and further research brought me here.
So my question is what to do when your cake shrinks a bit. I’ve lined my cake rings with acetate and I read somewhere that some bakers then frost the inside of the acetate before adding cake and filling. After freezing and thawing to chilled, you then have a complete crumb coat ready for the next step. Have you ever done this? Suggestions on how to do it? Or do I just add enough extra filling that when I push down on the layers the filling oozes into those spaces?
Yes – I’ve done what you described. It’s a good solution for when there’s extra space in the pan. You have to be careful though because the layers can slip around. So you want to pipe the buttercream around the outside as you’re building the cake to avoid shifting.
As for pushing down hard enough that the filling fills the spaces, that will work if the filling is also buttercream. But if it’s something softer like cream cheese filling or lemon curd, don’t do it. You don’t want that stuff all over the outside of the cake.
The wedding I’m baking four tiers for and a grooms cake I’d due Saturday, October 10th,can I start baking this week, ( sept 14) and freeze until a few days before wedding…I really, really don’t want any time issues with this order, it’s my first wedding cake and grooms cake…and no assistant. Thank you very much..can’t wait to try the technique.
Yes, technically you can, especially if you have a freezer that is dedicated to just cakes/desserts. If your freezer is already jam packed with other things like meat or fish, then I don’t recommend holding a cake in there for more than 2 weeks.
Thank you very much, I have a deep freezer, and will start clearing it out now..even 2 weeks will be helpful to me, thank you so very much for getting back to me. I look forward to getting your book and other courses.
You cakes have so much filling. How do you avoid the cakes sagging ad creating the dreaded side bulge?
Brandi,
You can find the answer to your question in this related article about layer cake filling.
Hi,
I would like to know when the cake is removed from the freezer do I remove it from the pan immediately and cover with buttercream. I’m worried it might cause the fondant to sweat. I like this method and I really want to try it.Thanks
Lawrita,
Good question! I think you will find all the answers in this article here: How to Freeze Cakes
This is an awesome site – thank you so much for sharing! I’ve got a question about your buttercream : creamcheese filling from another comment. I’m making a carrot cake for my friend’s 40th and we’re getting 30C days here. How stable is this filling on hot days and how long is it safe to keep out of the fridge before serving please?
Hi Anna,
So it’s a relatively stable filling formula compared to other cream cheese formulas. 30C is rather warm but not too warm for it. My suggestions are to make the filling layers no thicker than 1-2 cm. If it’s a small, single tier cake, then it can sit on display for 1-2 hours. If it’s a larger, stacked cake with big base tiers, then it will remain more insulated and should do well for 2-3 hours. I try to aim for a 1-4 hour window on all cakes. Even on a warm day though, it’s important to allow the cake to sit out for long enough that it comes to room temperature before being served because it will have a more appealing taste/texture that way.
Will this method work for a 3 milks cake?
I haven’t tried it personally but I have heard of bakeries doing it so yes, you should be able to freeze a tres leches or three milks cake.
Ok thank you for your reply. I will try it out.
I would also like to thank you for sharing what works for you and all the amazing tips you give us.
I’m just a hobby baker, self taught and I just want to keep learning as much as I can and also pass it along.
This is the cake I did trying your way of filling a cake. I think it cake out ok for my first time.
That is more than okay for your first time. That is fabulous! Thank you for sharing your home baking experience with us, Vicky! I’m glad your first attempt at this method was such a success.
I am making my own wedding cake (yes delusions of grandeur)
Michelle,
That’s a big undertaking! I know some other bakers who have pulled off doing their own wedding cake though so it is entirely possible. Make sure to leave yourself time for sleep! Good luck!
– Kristen
Not all of my comment came out before. It was supposed to also say thank you for your post and I am thinking of trying this out. I will have to make the cakes in advance so this seems a good process.
How far in advance would be safe for keeping flavor and texture do you think? Normally I make a wedding cake the day before so it’s as fresh as possible, but for my own this won’t be an option.
Michelle,
You’re welcome. Using this system, you could make your cake a week or two beforehand then freeze it in the pans. Then at least that part will be over with. More information on how to freeze/thaw here: http://www.wickedgoodies.net/freezing-cakes/
Assuming your wedding is on a Saturday, you can start thawing on Wednesday. If the cake is iced and completed by Thursday, it should still be fresh for the event. I have seen this done plenty of times in bakeries. Any earlier than that though and it should be held frozen.
Wow that’s great thank you!! I might actually pull this off
I will have it frosts with buttercream, but I do want t cover it in fondant because I find it to look much cleaner. How long after taking it out of the freezer and defrosting in the fridge will it be safe to cover in fondant? I don’t want it to become gooey.
Fondant won’t get gooey as long as the surface of the cake remains sealed in plastic wrap. Timing for how to freeze/thaw cake is discussed in the article, How to Freeze Cakes.
Awesome vide. My question is more of schedule. So I bake, cool the cake, tort and fill in the pan and put into freezer. If I left it in the pan wrapped over night and take it out of pan how long will I wait before I start to ice the cake ? Would I leave it in the fridge or out on counter and for how long so that it is still cold when I ice it? same question but what if I froze it for couple of hours pan how long before I can ice it?
So you can leave the cake in the freezer overnight (small 6″ cakes may only need 3-6 hours in the freezer but if the cake is larger, it’s better to chill them overnight) or for several days. De-pan them in the morning, while they are still frozen (the cakes will stay better intact that way). If they are large or highly contoured cakes, you might want to apply the crumb coat while the cakes are still frozen solid. If not, wrap them in plastic to seal out the air and let them defrost in the fridge. Depending on how big the cakes are, they should be cool but not frozen and ready to frost by the afternoon/evening. I do not recommend defrosting cakes by leaving them out at room temperature. It’s better to maintain them at refrigerator temp.
You can always crumb coat or dirty-ice a cake while it’s still frozen but it’s better to wait to apply the final coat when the cake is refrigerator temperature so that you can avoid the issue of condensation.
I’m learning so much here! Your recipe for the turtle filling is it in your book also? Once cake is released from pan can I carve into any shapes… example a purse.
To make the turtle filling, use the chocolate buttercream recipe that’s in the book + caramel sauce + toasted, chopped pecans. Build in that order between layers of chocolate cake. Yes, you can carve the cake afterwards. It will be easier to carve while the cake is still semi-frozen.
I’m concerned about using this method, do you see or have your filling showing threw the buttercream frosting? I’m making a wedding cake using a berry filling this method looks like such a great idea. But will my berry filling show threw the buttercream frosting? And I do use Cisco for my buttercream, I need it to be bright white. Any suggestions? Thank you!
When you add the berries, don’t push them all the way out to the edges. That will help prevent this problem of berry leakage showing on the outside of the cake. As long as your filling is sturdy and your frosting is thick, this should not be a problem.
I do not support the idea of using shortening as the basis for making cake frosting. I believe it’s better to let frosting be a little yellow than it is to substitute it with a synthetic fat. You can read more here about butter versus shortening in cake frosting.
As an alternative, you can always try adding titanium dioxide (white food coloring) to buttercream frosting. I also heard recently that a *tiny* bit of purple food coloring can help balance a yellowish frosting out to look more white, since purple is the opposite of yellow. However I wouldn’t try that without testing it first as evidently the results can vary from brand to brand of purple food coloring.
i was wondering if you had any other tricks to stacking cakes. everytime that i have ever tried to make a layered cake it has always fallen apart on me either before i even try to stack it or during the process. what are your thoughts.
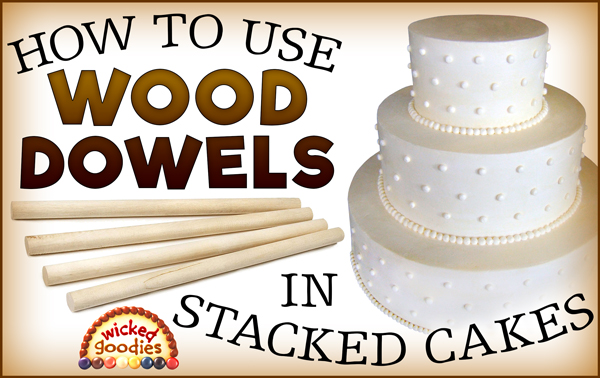
I use the dowel method and there are a bunch of tips on this tutorial here >> http://www.wickedgoodies.net/2010/08/how-to-use-wood-dowels-in-stacked-cakes/
Hi, thank you so much for sharing all this information. I will be making my first 3 tier birthday cake in a weeks time, so finding your tutorial is really helping me stay calm. But…(why theres always a but?):((, my cake pan is too big for my freezer:((. Less than an inch more, but the door won’t close:((. I have tried. Will it be ok to just put my fridge setting to the lowest and put it there? Can I still prepare it a few days ahead?
I really appreciate any advice you can give.
Hi Lisa. Oh dear! What a pity it won’t fit. Yes you can absolutely do this using just the refrigerator and if you turn its temperature down to low, make sure all your produce and delicate items are down in the crisper drawers or as far away as possible from the source of the cold as I’ve found that stuff on the top shelf (like beers or a head of lettuce) will freeze when you turn the temp down all the way.
Thank you so much for the this information. I’m excited to finally get the height I want for my cakes (and all the same height). I bought your book hoping that it also had the recipes for all your filling and was disappointed that it did not. Is there someplace I can find your recipes for all your fillers (for between the cake layers). Thank you!
Actually the buttercream recipes that are in the back of that book are the basis for most of my cake fillings. I mix the vanilla buttercream with 50% cream cheese (in a food processor, first blending the cream cheese, then adding the buttercream) to make a nice and stable cream cheese filling. Those frostings can also be flavored or layered with nuts, fruit, toasted coconut, or what have you.
Thank you for your prompt reply! I do have one further question for you. Am I understanding it correctly to be a 1:1 ratio between buttercream and cream cheese?
Yup that’s correct. I weigh them out to be sure. I’ve found that 50/50 is a good balance of flavor, sweetness, and stability (I usually add a dash more vanilla too). I should warn you that it will be quite soft at first but as long as you use my layer cake filling method, it will stay neat and in the pan during assembly and then harden up overnight into nice stable filling layers.
Thank you!
You are awesome! This is great! I got the free buttercream tutorial on craftsy, and he cuts the sides of the cake off. I have tried that and Lawd! What a mess I make! And another YouTube video shows a dam of thick “criscocream” frosting, but I refuse to give people raw Crisco as their last bite of my cake. Yech! So I was looking for another thick icing recipe to use as a dam, and i I found this! Yay! No Crisco dam!
Appreciate it greatly!
Nancy
Yuck! Glad you don’t have to make a Crisco damn again. Sounds kinda gross.
Hi, I have a huge cake to make and NO refrigerator space. Wondering if you have any magic tricks, so that I could defrost at room temperature? The cake will be cover in fondant 🙁
No I don’t recommend defrosting at room temp. It’s better to use the fridge/freezer for filling cakes or just the fridge. Although I suppose if you used the freezer only for a few hours or just enough to get the cake cold but not frozen, it could work and you could continue using it just enough to chill the cake when needed. Although you would definitely have some problems with condensation going from freezer to room temp. The fridge is the better environment.
Thank you 🙂 I ended up investing in the frigidare beverage center. 4.6cu found at Lowes. How do I transition the cakes from fridge temp to room temp (covered in fondant) ? Here is my strategy layout: I plan to bake, fill and freeze for 4 hours (biggest cake 12inch round) then buttercream crumb coat, cover in fondant. Leave the fondant covered cakes overnight in the fridge wrapped in plastic. I don’t know what to do after that. I would appreciate any suggestions. Thanks a lot.
http://m.lowes.com/product?langId=-1&storeId=10702&catalogId=10051&productId=3262661&store=undefined&view=detail
Good call on getting an extra fridge! Now you don’t have to do anything special when going from fridge to room temp with a cake but it does help to make sure your kitchen is cool and that there is no direct sun (coming in through a window) on the cake or your work space while it’s out of the fridge. Return the cake to the fridge whenever you are not working on it to keep it firm and chilled. Allow it to chill again (after you’ve finished decorating) for at least a few hours before transporting it to the party. That will help keep the whole thing stable. Is it a stacked cake? If so, here is my tutorial on dowel infrastructure: http://www.wickedgoodies.net/2010/08/how-to-use-wood-dowels-in-stacked-cakes/ Best of luck to you!
Your tutorials are awesome! They have helped me tremendously. Where can I find your cookies-n-cream filling recipe?? It looks absolutely scrumptious!
UPDATE: You can now find this recipe here: Cookies & Cream Cake Filling
It’s just 1 parts cream cheese (in food processor), 1 parts buttercream frosting and crushed up sandwich cookies, folded in by hand.
Love your book and website. As I read the above thread you mentioned after you put fondant on your cake you should wrap in plastic wrap to avoid condensation. Will the fondant become sticky covered in plastic wrap?
Do I need a commercial refrigerator for this task?
Thanks! In fact the fondant stays drier if it’s covered in plastic wrap. It’s when the surface of the cake is exposed to the refrigerator air, especially while defrosting, that it can become sticky, making it harder to decorate and causing colors to bleed.
This is a great idea. Tried it for two wedding cakes (my first) made for this weekend and it turned out perfectly!!! Thanks for a great inspirational site! 🙂
Wow – nice cake! Thanks so much for sharing. I’m glad this technique worked for you 🙂
This looks like a great method for filling cakes. It also looks like it may help with my dreaded task of trimming the sides of my cakes which is such a pain to me and always gives me fits. Do you find with this method of filling that it is unnessary to trim and even the cake sides? Also I like to bake in 2″ cake pans. Do you think I would still be able to use this method to fill versus bake and fill (if so I will just purchase the 4″ pans to fill in)?
You do not have to trim the sides of cakes when you use this method. 2 inch pans are not ideal but you can still use them for this method. Simply extend the sides upwards using strips of parchment paper or acetate. Alternatively, you could invert one of the pans and sandwich the cake in between them, then wrap the whole unit in plastic wrap. That will prevent the top half of the cake from shifting.
Thanks for the reply! I will continue to bake in 2″ pans but will purchase the 4″ pans just to fill. So excited to not have to trim my sides!!
One more question: Is it right to interpret that I crumb coat and cover in modeling chocolate BEFORE thawing, and do final decorations afterward?
You can crumb coat and cover a cake in modeling chocolate while it’s frozen OR once it’s thawed to refrigerator temperature. I play it by ear…so for cakes that are very small or odd-shaped or unwieldy, I frost/cover when they are still quite frozen because I find it’s easier that way. Basic cake shapes on the other hand, I am more likely to frost/cover at refrigerator temperature because they do not require as much handling. Just remember when working with frozen cakes that they develop condensation on the surface as they thaw. That problem can be managed by keeping the surface of the cake covered in plastic wrap until it’s done transitioning.
Thank you! Thank you! Your reply to someone else just answered a problem that I encountered. I had a frozen cake that I covered and decorated in buttercream and popped right back into the freezer. It was covered not tightly in foil so as not to ruin the decorations and all that was in the freezer wrapped in nylon. I defrosted it in the fridge before serving and was saddened to see that there was quite a bit of condensation on the cake. I understand now why I got the condensation, but what is the best way to wrap and freeze without flattening and destroying buttercream decorations?
I wouldn’t freeze a cake once it’s decorated but if I have to do it, I first put it bare into the freezer, until the surface is hard. then I seal it snugly in plastic wrap within another sealed container.
What is the maximum amount of time you can leave the cake in the freezer before depanning and thawing to decorate?
Home freezer: 1-2 weeks
Sub-zero cake freezer: up to 6 months
In both cases, cakes must be well-sealed in plastic wrap.
all this is very helpful, I have also seen the cake rings used for filling but have been unable to find them yet. I also always have problems with filling and frosting bulging. I have a cake coming up that the person wants raspberry filling and butter-cream. Would you put the frosting down first then the raspberry filling?, or visa verse. I like to put in about 1/2 inch of frosting and filling. Should I go to a quarter inch. Also lately I have been getting a lot of gas bubbles under the frosting, it is driving me nuts. Could you please make some suggestions.
1/2″ amount of filling is just right and you do want to start with jams, jellies, and curds on the bottom if you are putting frosting on top of that. The trick is to put a very thin amount of filling so that the frosting still has some cake to grip on. Double fillings are much easier to pull off using this cake-filling-in-the-pan method. Gas bubbles in the frosting…you will not have that problem if you use this cake filling method and push your fillings all the way to edge of the pan. Then when you de-pan the cake, it’s solid with no gaps where the filling was missing so there’s nowhere for air pockets to get trapped.
I worked for a pastry chef for a year as a cake decorator. I never saw anyone fill cakes like he did, which is your way, and apparently, a pretty pro way to do it! I have cakey friends who think I am insane to fill in the pans and have filling to the very outer edge with NO ICING DAM (nooooooooooooooooooooo) but I never have bulges and they do. I’m glad to know that not only is this not a wrong way to fill, but a really good way to fill! Not that I would do different anyway; it’s been working for years. Oh, and I hate icing dams because then the whole outside of the cake has nothing but too-sweet buttercream for filling.
Just to understand layers correctly. There’s the cake,”filllig”, buttercream, then the cake? or is it cake, “filling”, cake, buttercream?
Also my cakes shrink a little and when I put the second layer of cake on top, they don’t always line up because I am pushing the buttercream/filling to the edge of the pan. Should I simply be pushing the buttercream/filling to the edge of the cake instead?
Love the concept. I know longer have gas bubbles but still struggling slightly.
*I no longer….
You can fill cakes anyway you like. I usually go cake – filling – cake – filling – cake, sometimes alternating fillings, sometimes not. The buttercream frosting does not go on the cake until the end, as frosting, although it can certainly double as a filling too.
If your cakes are shrinking so much that they no longer fit in the pans well, you have to fill them a little differently. Stack all the layers on the same side of the pan and maybe even shove something like some folded up parchment or wax paper into the empty space so that the layers don’t slide out of alignment. It’s not as ideal and the cake may require some carving afterwards to straighten it out but it will still work. If there is a tremendous amount of extra space in the pan, you can also build a wax, parchment paper, or acetate dam around the cake layers. This can also be done to extend squatter pans to make deeper cakes.
My cake fillings are very stable and can stand on their own so I don’t mind pushing them out past the cake a little as long as it’s only 1/4″ inch or less.
You are so awesome . I learnt so much from reading your answer to the comments. I have a little cake business but need so much help and improvement , but I am getting there . Thanks dearly again.
I’m rooting for you and your cake business, Marlene! Glad to hear that you learning a lot from this website. – Kristen
I found this such a neat idea but I must admit I am a bit lost. so on the bottom of the pan do I put parchment paper? I understand putting the layers of cake and the filling in between. what I don’t understand is how you got the buttercream on the outside – was that put on the cake layer before going in pain or on the cake pan itself.
then as I understand you freeze it. once frozen or when you are ready to finish you the go to “how to unpan” the cake tutorial right?
as well do I apply fondant while still frozen or do I wait to thaw out – I always like to put my cakes in fridge for a bit to set the buttercream so not sure how this would work
I am only a hobby baker but obviously like to make them look nice
Yes, you always keep parchment on the bottom of the pan to prevent the cake from getting stuck.
Once cold/frozen, simply follow the instructions for de-panning the cake.
This tutorial only shows how to fill the insides of the cake. You still have to frost the cake afterwards. I prefer to wait until the cake is defrosted before putting any final coat of buttercream frosting or decorations on it.
Just a suggestion: I often use parchment to line the sides of my pans, in addition to the bottoms, before baking so that they don’t stick. If the sides are again lined with parchment before putting in the cake layers and filling, the then frozen cake won’t stick to the sides and no need to apply heat to remove it all from the pan. What do you think?
Great suggestion! I know a pastry chef who does this for her wedding cakes when filling them also to build up the sides of her shallower pans.
My question is do we fill the layers and ice them at the same time before putting in the pan and freezer?
No they don’t get iced and filled at the same time. First, they get filled. Then frosted. This tutorial only covers how to fill the cakes. Follow this link for my course on how to frost cakes with smooth buttercream frosting.
This was really helpful, I’m only a hobby baker but like to make sure my cakes look good xxx
I have found this thread soooooo helpful and I’m defiantly going to try this method on my next cake. I have one question though…what do you mean by crumbling the cake, and crumb layer? Maybe it’s because I’m in the uk but I’ve never heard that terminology.
Many thanks x
Hi and thanks for writing! I’m glad you found this thread helpful. Crumb coating the cake is when you add a thin layer of buttercream frosting to a cold cake to lock in the crumbs before adding a finish coat. It’s not necessary for standard cakes but when frosting wedding cakes, it helps maintain a cleaner-looking finish. The trick is to refrigerate the cake in between the two coats.
I am making a lemon drizzle cake for my grandsons Christening. I am fondant icing and decorating with a hand made fondant jungle theme.
I need to fill the cake with a lemon flavoured butter cream. When I crumb ice the filled cake can I use the same lemon flavour buttercream(includes lemon curd)…. or shall I just use plain Butter icing.
Marion, I would recommend crumbing the cake with buttercream frosting for stability.
I have doubt here… After following all these.. Shld I defrost & cover with fondant b’coz I remember reading tht the cake will expand when it comes out of freezer. & keeping the cake inside the refrigerator after covering with fondant will tht create moisture in fondant. Plz excuse me if these are silly questions I am so new to caking & stuff.. TIA.
Laya
As long as you keep a cake sealed in plastic wrap while it’s defrosting or while it’s in the refrigerator, you will prevent condensation from forming on the surface of the cake.
I read this post yesterday and just had to try it! Today I made a peanut butter cup cake with peanut butter mousse which tends to run out from between the layers assembling a cake with the “dam” method. This method worked like a charm! I love it. I just ordered a bunch of 3″ deep pans so I can always do it this way. Thanks so much for sharing!
That’s awesome news. You are very welcome! 🙂
OH MY GOODNESS! I seriously love you! I’ve had so many issues with my cakes not stacking up as nicely and I like to have a good amount of frosting but it always ends up squished in between cake layers. I most definitely need to do that. And you now have another follower for life 🙂 I do have another issue and maybe you can do a tutorial of it for me…and perhaps others that have my same problem. After I crumb coat my cakes, I add another small layer of buttercream and put it in the refrigerator for 30 minutes and I lay my fondant over and it looks perfect but after a couple hours my frosting starts to bulge making my cakes not look so pretty anymore. Heres how I make my butter cream, 2 cups of unsalted butter, and I use 8 cups of powder sugar, 3 tablespoons of milk or heavy cream and then some flavoring. Is there something I should fix with that so it doesn’t run?
Oh and also some times my frosting starts to seep out and comes out from under the fondant. My other problem is, is that I’m not sure how much or little buttercream I need to put on before I lay on the fondant.
The purpose of the buttercream is to give the fondant something to stick to. You don’t need a lot of buttercream – just a crumb coat. Too much buttercream under fondant = lumpy cake. Only put a little. And make sure to use a cold cake. If the cake is cold, the buttercream will stick to it hard and fast and not weep out. Be sure you are also transferring your cake into the refrigerator between stages of assembly and decorating. Then keep it there until it’s time to display it.
That sounds like the same recipe that I use for buttercream so I don’t think that’s your problem. Overly soft fillings are more often what cause cakes to bulge. Be sure to use sturdy fillings that include a binder like gelatin or egg yolks. Butter is also good in fillings because it gets nice and hard when cold, making cakes easy to manipulate (after refrigeration). Mix some of that buttercream with your filling and that should help. Here are my recipes for cake filling.
How long would you need the cake to sit out after the two hours in the freezer if you want to cover it with fondant? I was just thinking you can’t cover it right away as I didn’t think you could put a cake covered with fondant in the cold like in the fridge.
I wouldn’t let the cake sit out. I would cover it in fondant while it was still cold. It’s easier to cover cakes in fondant or modeling chocolate when they are very cold because then the edges of the cake stay nice and crisp. Just make sure to afterwards seal the cake in plastic wrap then return it to the fridge to thaw out slowly. The plastic wrap will prevent condensation from forming on the surface of the cake.
I love this idea. I have good quality two inch pans. Would this work? I use regular pans to make cheesecakes and use the torch to get them out.
2″ pans are quite shallow. It would be hard to build a tall cake in a shallow pan like that. If you were making shallow tiers (2-3″ high), it would work.
I use foil collars for my cakes. All of my cakes, barring special designs, are 4″ high and all my pans are 2″ pans. I also know my cakes are always exactly the same height because all my collars and pans are the same.
Yes foil collars are a great way to make a shallow pan deeper! Thanks for mentioning it.
Hi!
I´m a cake designer here in Brazil and most of us here use this method! It´s perfect!
The only difference is that we line the cake pan with plastic so it´s easier to get the cake out (because we use fillings that are a bit more soft).
This method made my life so much easier and make cake filling much faster! 😀
I like that idea. I do use a plastic liner when filling cakes in half sphere (bowl) molds because they are harder to get out of the pan. But then I find that I have to be very careful about that plastic getting stuck and ripping off into the frozen filling. So I only use plastic when assembling cakes in half sphere molds.
I did mean deep, sorry. I am baking my first wedding cake next week and I’m happy I found your website just in time! Thank you!
How thick are these pans? I was searching on Amazon, but can’t find anything thicker than 3 inches.
The thickness of the metal is 16 gauge, which is just right for cakes. But do you mean deep? I prefer 4″ deep pans for commercial baking and 3″ deep pans for home baking (the square ones in the pictures are 3″ deep and the round ones are 4″ deep). You can definitely find
4" deep pans on Amazon
just not in every size (even numbered diameters only). At the link I just provided, look for the drop-down size menu that allows you to select what you want and within that list, you will see 4″ deep pan options.