
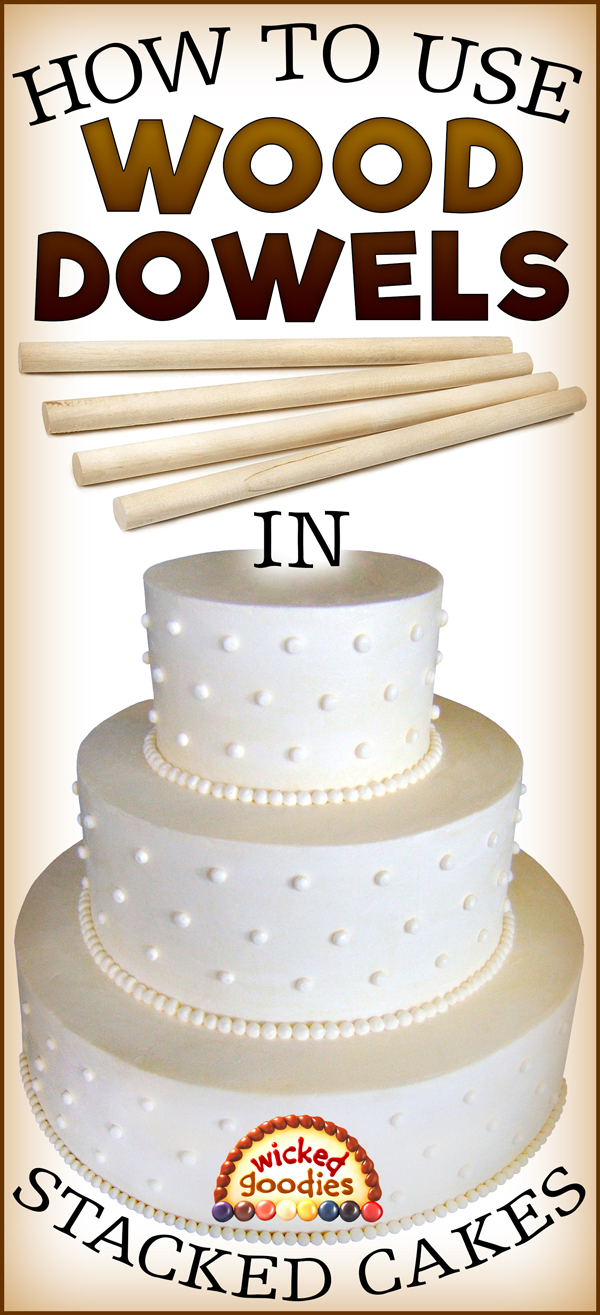
There are a number of ways to add infrastructure to the inside of a wedding cake or sculpted cake so it doesn’t collapse. After building 1000+ custom cakes using a variety of systems including wood dowels, SPS and bubble tea straws, I’ve concluded that wood dowels are the most dependable, affordable, and versatile method of all.
4 Benefits to Using Wood Dowels
#1 They’re Dependable
Wood dowels are sturdy enough to support a lot of weight. Provided the cake itself is stable and its dowels are oriented correctly within, you can achieve great heights using this method. Dowels hold up well during transport so you can complete a whole 3-tiered cake in your kitchen then deliver it in one piece. It even works for precarious cakes likes the topsy turvy style.
#2 They’re Affordable
Wood dowels cost a lot less than plastic plate separating system and other newfangled products designed for cake stacking (at the end of this tutorial, I cover the pros and cons of other methods).
#3 They’re Accessible
Since dowels are commonly used for all kinds of projects, they are easy to find in craft or hardware stores.
#4 They’re Versatile
Since wood dowels are sold in a variety of thicknesses and lengths, they can be bought and trimmed to accommodate any size or shape of cake. Moreover, they can be cut flat on the ends or sharpened to make the two kinds of support columns needed to properly stabilize a cake.
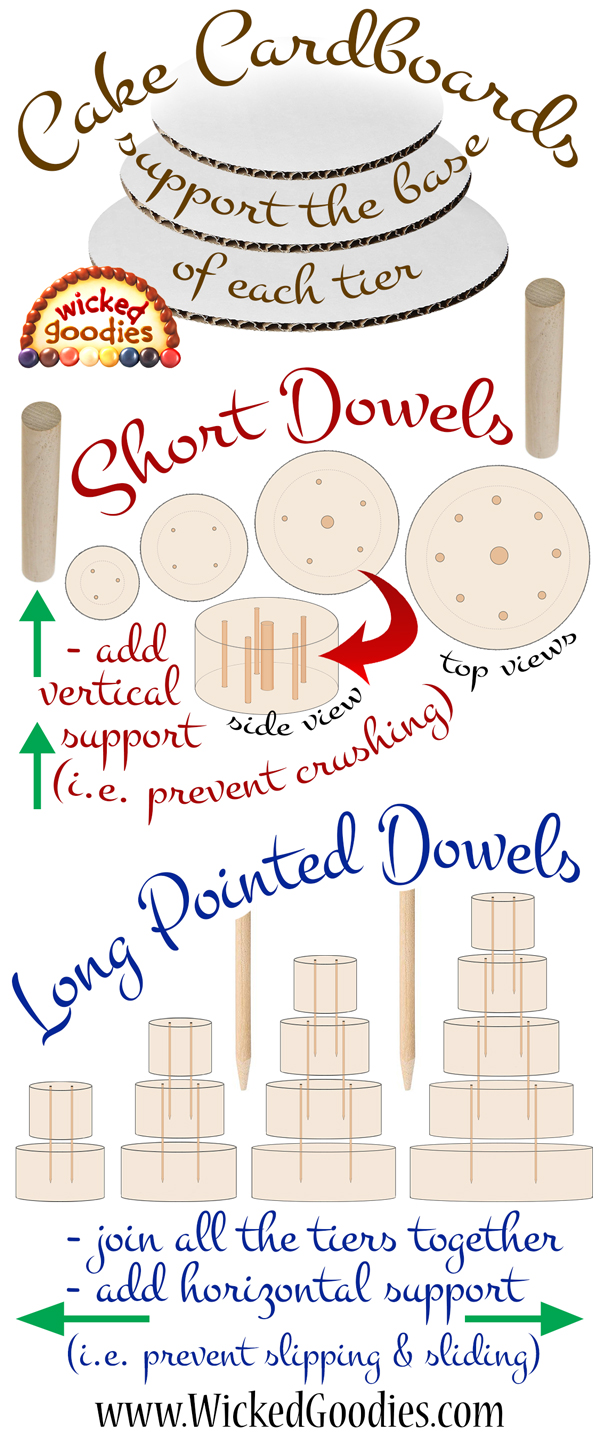
Cake Dowel Basics

- This dowel method involves hiding cardboard and wooden rods inside a sculpted or multi-tiered cake.
- Without being seen, these non-edible interior supports hold the cake up.
- There are two kinds of dowels involved with this system.
SHORT DOWELS lend vertical support to a cake, preventing it from getting squished or crushed by the cake stacked above.
LONG POINTED DOWELS lend horizontal support, preventing the tiers of the cake from sliding side-to-side or slipping apart.
VIDEO #1: How to Use Wood Dowels in Stacked Cakes
VIDEO #2: Stacked Cake Assembly Using Wood Dowels
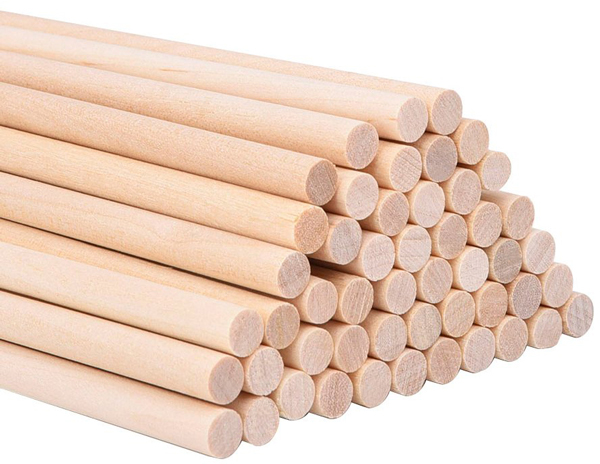
Best Kind of Dowels to Buy
I like the Wilton 12″ long, 1/4″ diameter bamboo rods (commission earned). They are stiffer than most kinds of wood and cut more cleanly as well. This is my go-to dowel for both short vertical supports and long pointed supports. As for thicker support dowels, I buy those at the hardware store so I can pick my preferred sizes.
List of Items Needed
- Long wood skewer/s (commission earned)
- Pen or marker
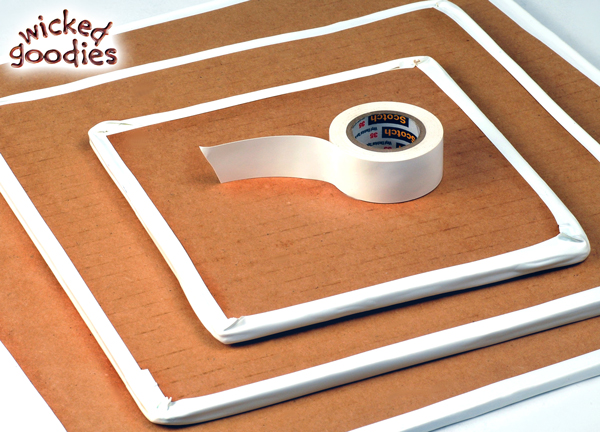
- Cardboard base for each cake (commission earned)
- White tape (optional)
- Dowels: 12″ Wilton Dowel Rods or 1/2″ wood dowels (commission earned)
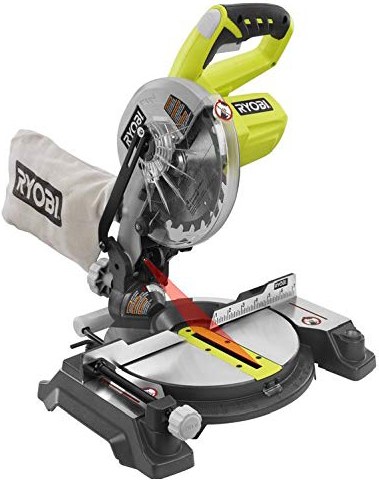
- Saw; for smaller dowels, large pet nail clippers work great (commission earned)
- Pencil sharpener (or knife for whittling)
- Sand paper
- Apple corer, for use with thick dowels only (commission earned)
The Purpose of Cake Cardboards
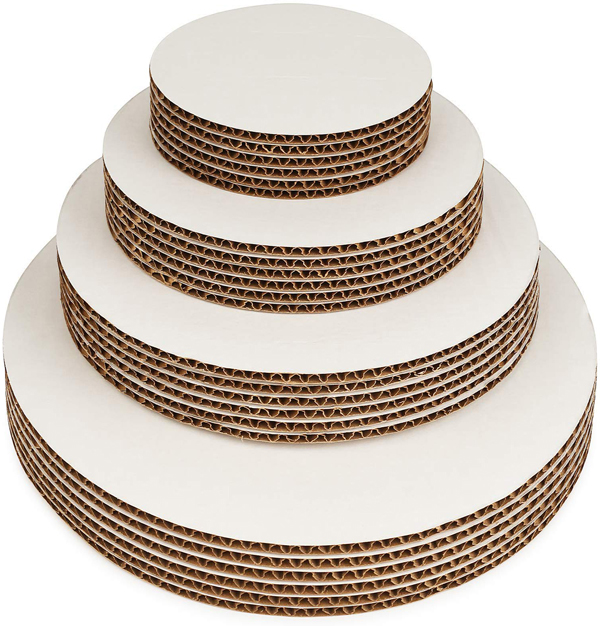
Every tier of every cake should get paired with a cardboard base (commission earned) that is the same shape/size of the intended result. For example a 7” round cake gets paired with a 7” round cardboard. In cases where the cake is oddly shaped, cut a custom cardboard base with a serrated knife.
This is not part of the presentation as it will never show. The cardboard base offers support and functionality to each tier of the cake. It’s meant to stay with its tier from the first moment it is frosted to the point when it gets served. Once it’s frosted, the tier and its cardboard will be fully fused.
Working with Short Vertical Support Dowels
I refer to dowels that support the weight of cake tier/s above as short support dowels or vertical support columns. They play a very important role in holding the cake up.
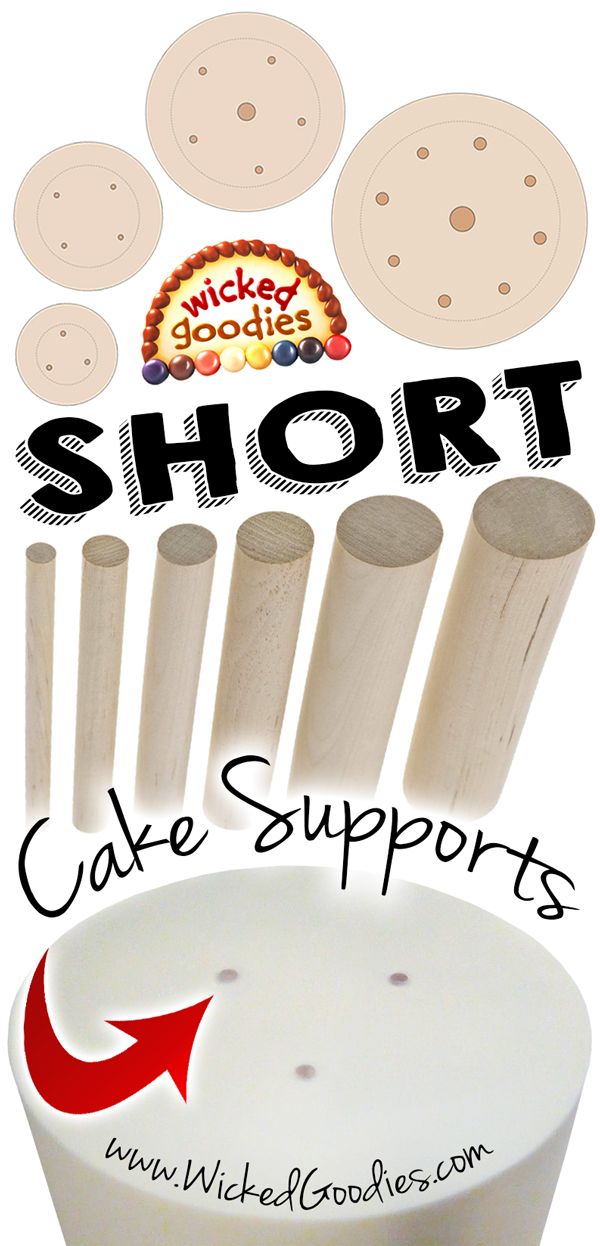
How Many Dowels Are Needed?
Depending on the size of the tier and the amount that will be stacked on top of it, anywhere from three to seven dowels may be needed to achieve stability.
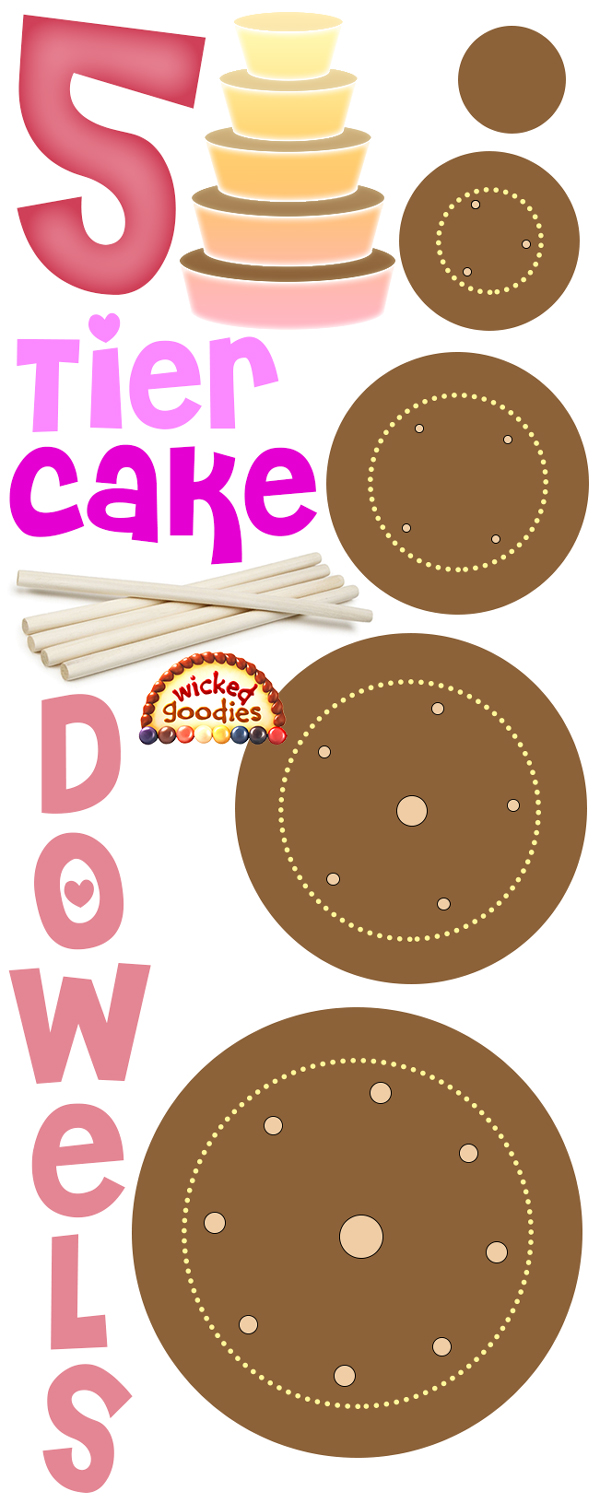
Above is a graphic depicting how I would orient the vertical dowel supports inside each tier of cake that is stacked up to five tiers high. The top tier doesn’t need any vertical support dowels unless you plan to put a heavy topper on it, such as a ceramic figurine. The dotted yellow line indicates where the next tier in the stack will sit so you can see approximately how far inside that boundary I like to place dowels. Remember to take that under consideration before you pick your spots.
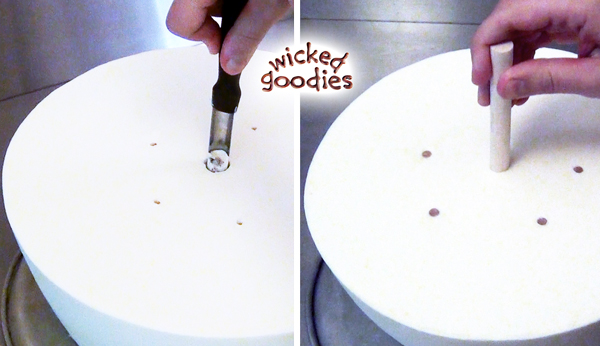
Tip: Core out Space for Thicker Dowels
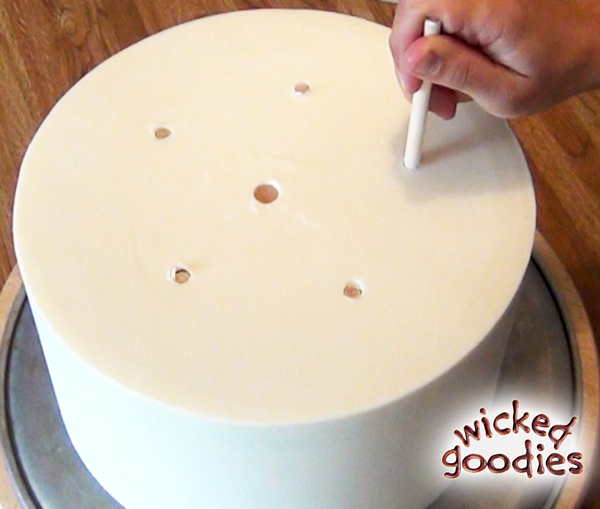
TRICK: How to Measure Short Vertical Support Dowels
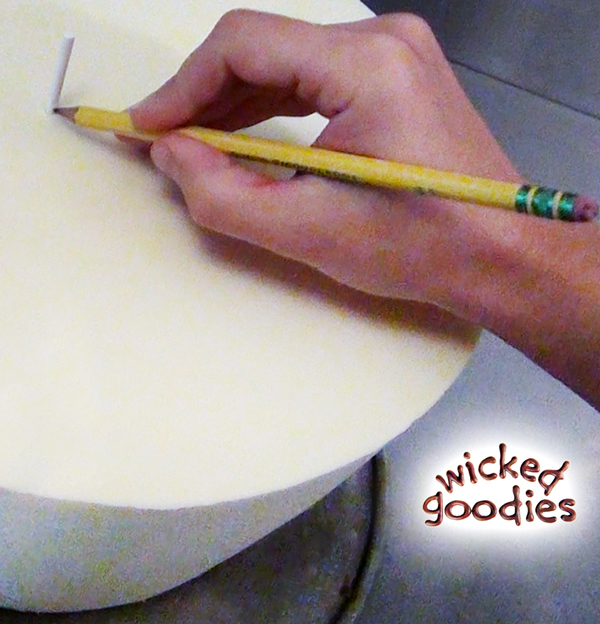
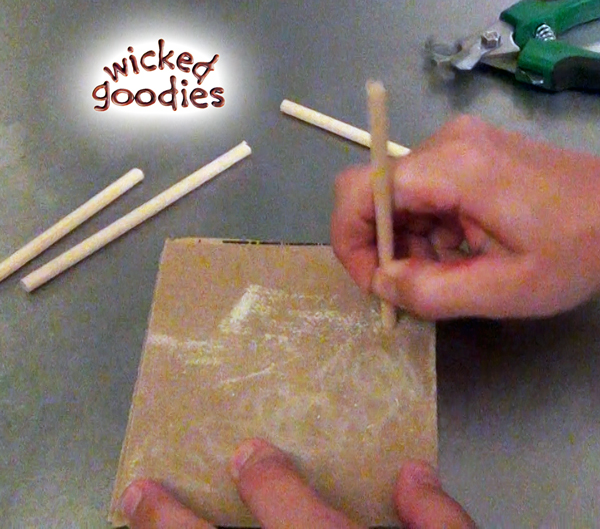
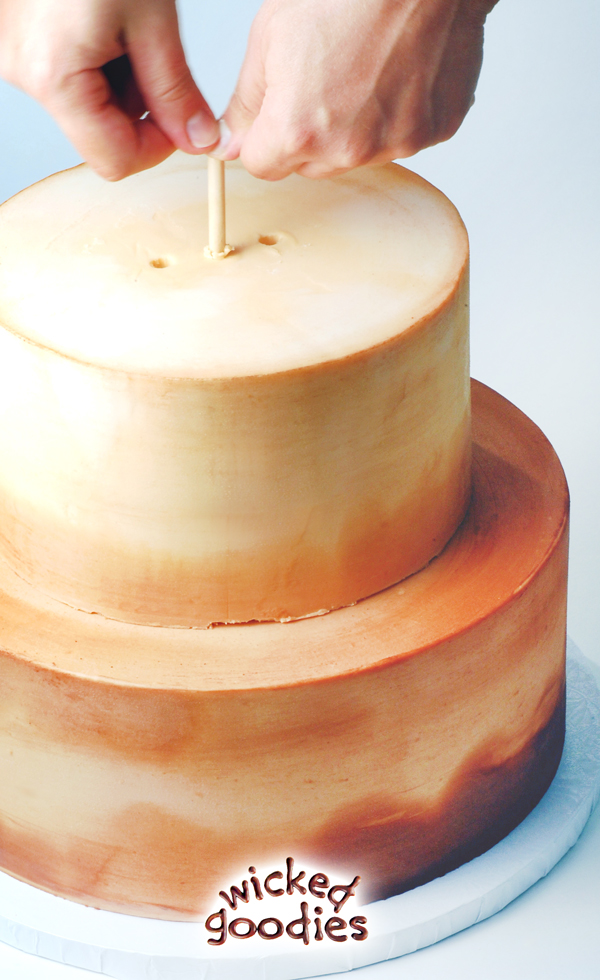
Once a cake tier is fully frosted, it’s time to measure its interior height in order to determine the length of interior support dowels needed. I’ve found the most accurate way to do this is by inserting a lollypop stick or long wood skewer (commission earned) dull-side-down through the cake until it hits the cardboard base. With a pen or pencil, mark the skewer at the point where it meets the cake’s surface. Then pull the skewer out of the cake and use its mark to measure the dowels for cutting.
I’ve found that I get better results when I use the skewer’s mark minus 1/8” (3 mm) to determine the length to cut dowels. Making them just a little bit short guarantees the two tiers being joined will touch all the way around. A seal between tiers maximizes stability.
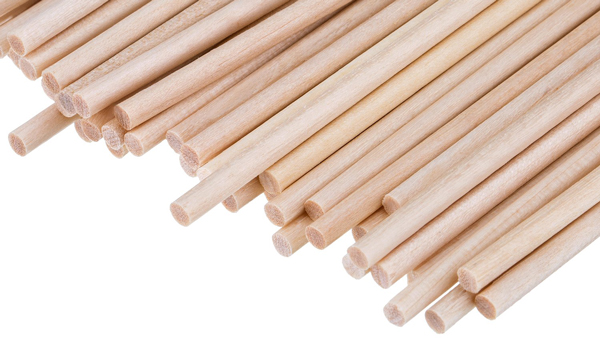
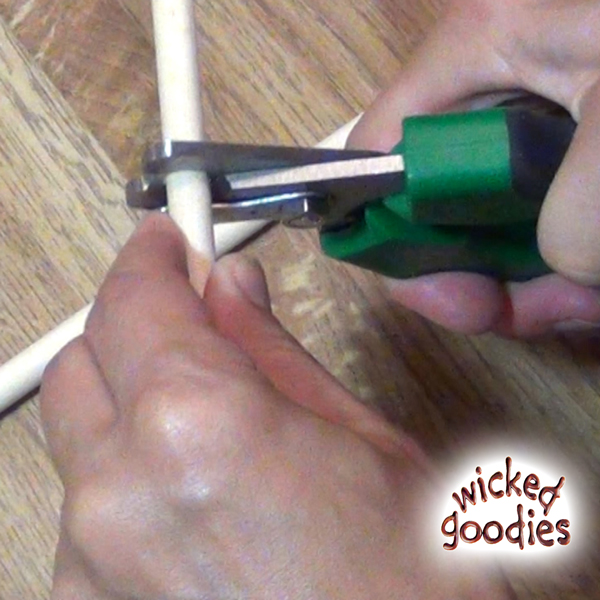
How to Cut Wood Dowels with Clippers
How to Cut Wood Dowels with a Handheld Saw

Another option is to use a handheld reciprocating saw (commission earned) like the one seen in the photo above. It is not the most accurate tool. It cuts aggressively and is quite likely to splinter the wood. But it gets the job done. Whenever using the type of tool that saws back and forth, it helps to first secure the dowels together with tape so their ends are flush. Then mark and cut them all at once. That way, they come out even.
A miter box (commission earned)as seen in the lower right hand corner of the photo above, may be used to assist the process of trimming dowels with a saw. A miter box is a gadget that holds the wood against slats, which guide the saw blade into making straight cuts.
How to Cut Wood Dowels with a Tabletop Saw
Sanding the Ends of Dowels
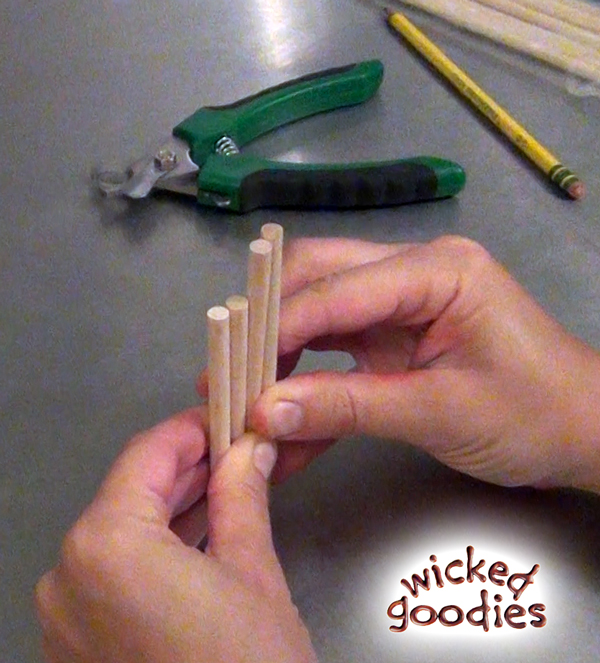
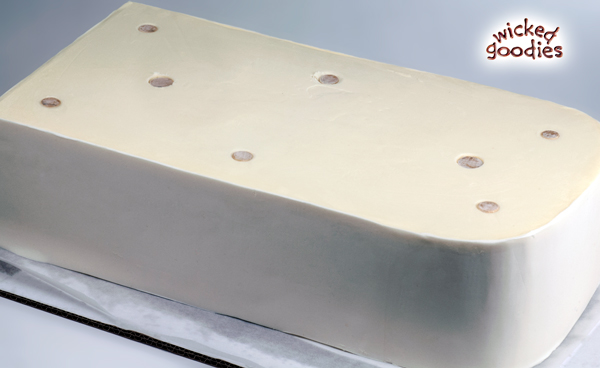
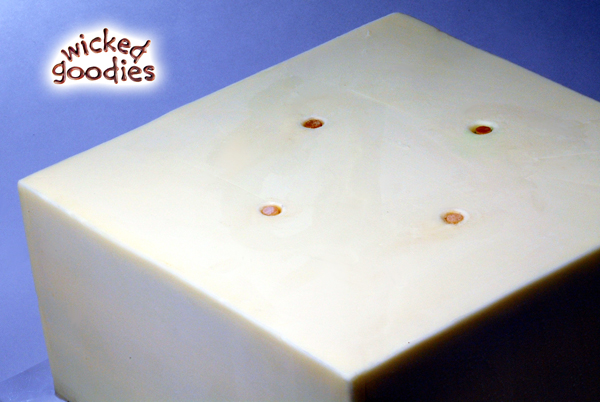
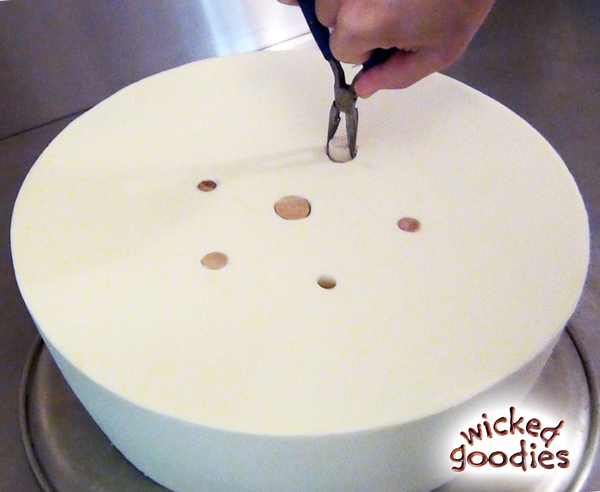
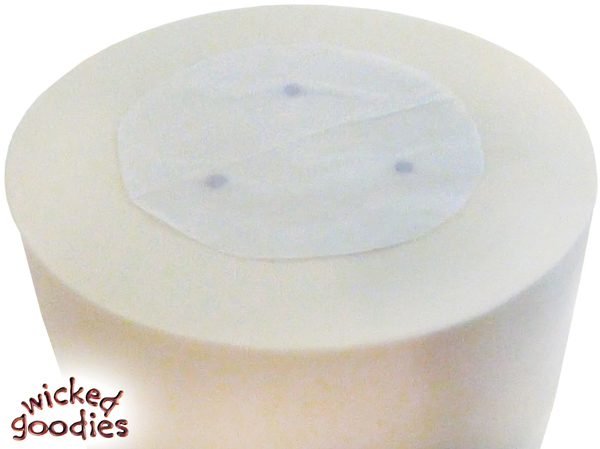
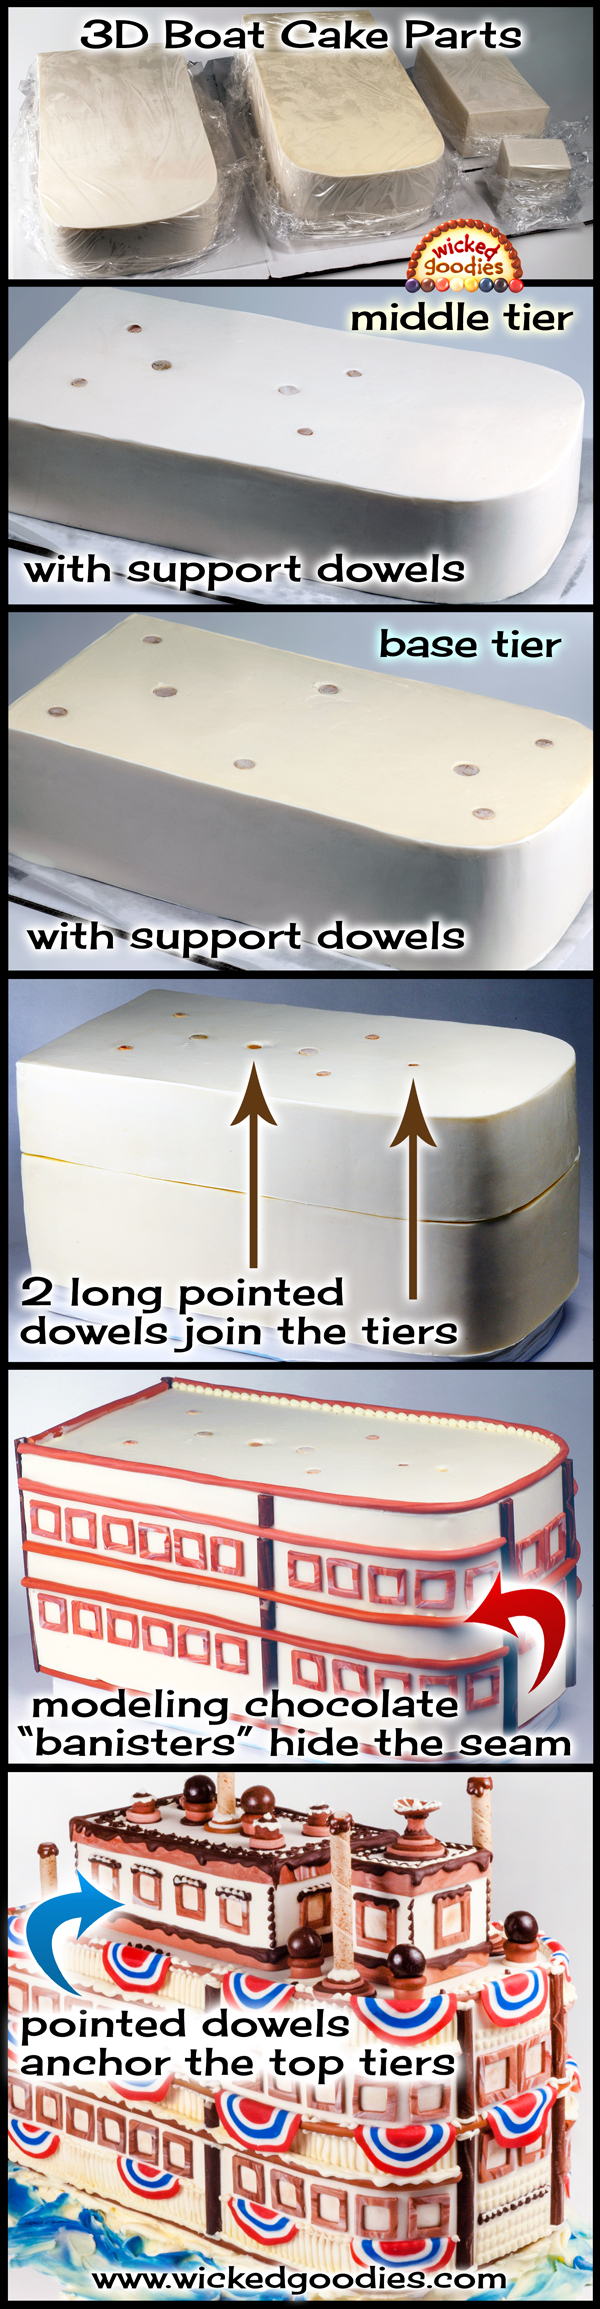
Once the dowels have been sanded, stand them on end together to compare their lengths and make sure they are all uniform and level. If they aren’t uniform and level, fix it. Otherwise, you may end up with a crooked cake. Below is an example of how short support dowels look on the base tier of a boat cake. You can see each dowel lies just below the frosted surface. They are configured to support the weight of a tier that has matching dimensions. A couple of thicker dowels are positioned at points where extra weight is due to be stacked above.
When to Insert Vertical Support Dowels into a Cake
The best time to insert this kind of dowel is shortly after frosting when the cake is somewhere in between refrigerator and room temperature. I naturally hit this point after just completing the final coat of frosting or just after the cake has been covered in fondant or wrapped in modeling chocolate. At that point in the process, I’ve had the cakes out at room temperature for long enough that the surfaces are soft and pliable. Then is when cakes tend to be the most tolerant of the pressure of being penetrated by dowels. I chill the cake while measuring and cutting the dowels, just to help the surface set. Then as soon as the dowels are ready, I insert them.
Remember to add short support dowels before the cake tiers are stacked.
Where to Insert Vertical Support Dowels
Always distribute vertical support dowels so that they most evenly absorb the weight that will be pressed upon them from above. For circular cakes, arrange them in a circular shape. For square cakes, arrange them in a square. In the example below, the dowels have been angled to accommodate an offset tier.
Working with Pointed Horizontal Support Dowels
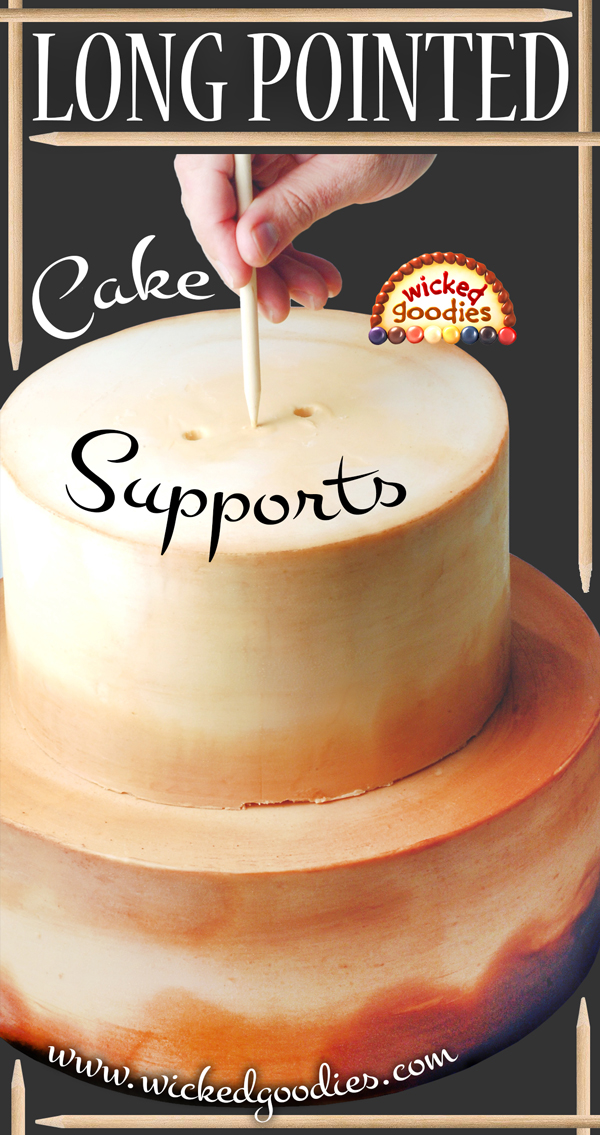
Two pointed dowels is just the right amount to join cake tiers together. I like to interlock tiers in the following way.

Note: what the graphic above fails to depict is that with each tier in a stacked cake, I rotate the insertion points. For instance, the bottom + middle tier insertion points will be at 12 and 6 o’clock. The top tier will insertion points will be at 3 and 9 o’clock. The goal is to space these kinds of tiers out evenly throughout the cake. This helps the cake resist horizontal force from any direction.
Some bakers prefer to insert one super long dowel through the middle of the entire cake. A single long dowel is satisfactory but not ideal. It’s harder to handle, more challenging to insert. It poses a risk since the cake can spin on its axis. I’ve learned the hard way that the vibrations of a long car ride can jiggle a tier loose, making it spinny or worse, wobbly. It may only spin a little bit, no more than a fraction of an inch back and forth, but that’s enough to stretch and squish the piped border, frosting and details along that seal. If the loose tier wobbles back and forth, that’s even worse as it can throw the whole cake out of balance.
The lesson learned here is to always use two long pointed support dowels per set of tiers being joined. One is not enough. Three is too many, unless the cake is gigantic (3+ feet high) or complicated in shape. Two pointed dowels per level is usually just right.
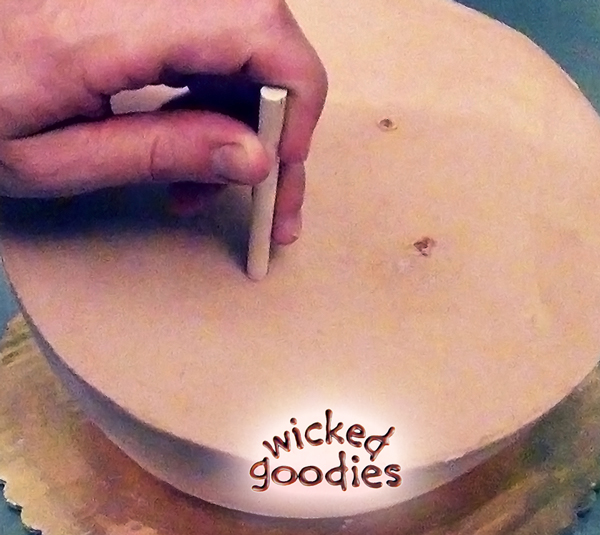
How to Measure Pointed Cake Dowels
This kind of dowel does not need to be precisely measured. It’s length can be eyeballed. The only criteria is that it must be slightly shorter than the combined height of the tiers it is meant to join.
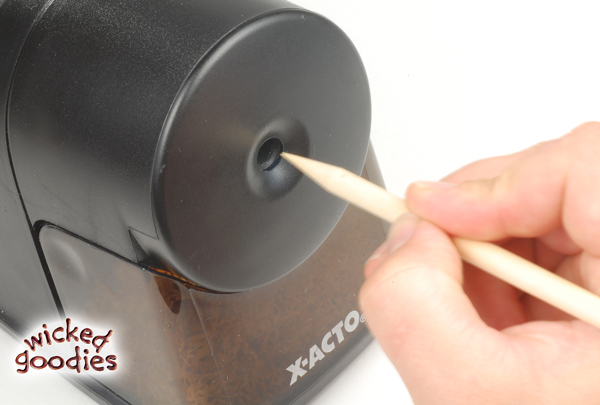
How to Sharpen Pointed Cake Dowels
Stacked Cake Assembly
When inserting long pointed dowels through tiers, press slowly but firmly with two thumbs. When the tip reaches the cardboard, you will feel its resistance.
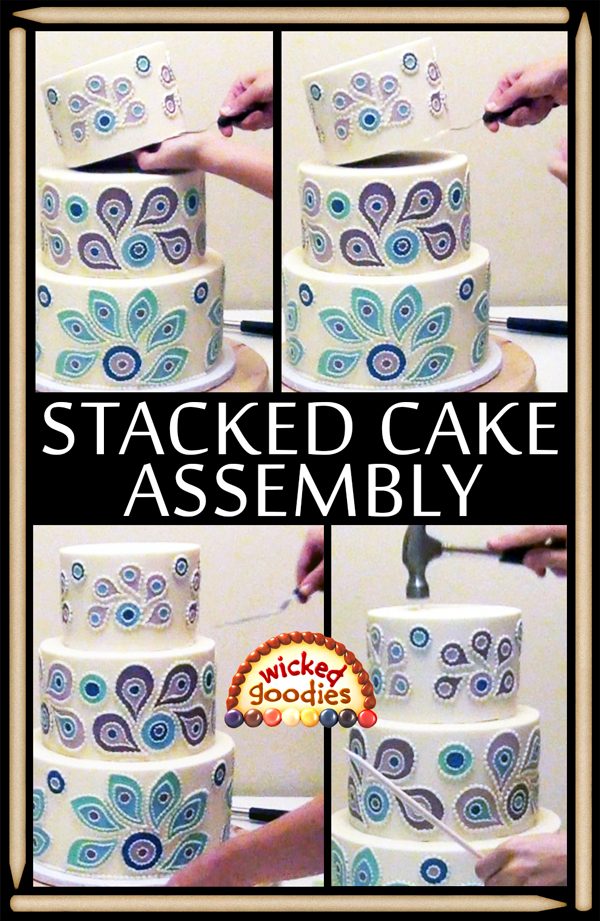
At the point of resistance, tap the blunt end of the dowel with a hammer so it pierces the cardboard base. Once the point has bored a tight hole for the dowel to pass through, you can complete the job by hand. Push the dowels down so their butt ends are just below the surface of the cake. Rather than burying them deep out of sight, it’s better to cover them with decorations, leaving them discoverable for the person whose job it is to find and remove them later on.
GENERAL TIPS & TRICKS
TRICK: How to Remove Dowels from Inside a Cake
TIP: Add a Layer of Parchment Paper Between Tiers
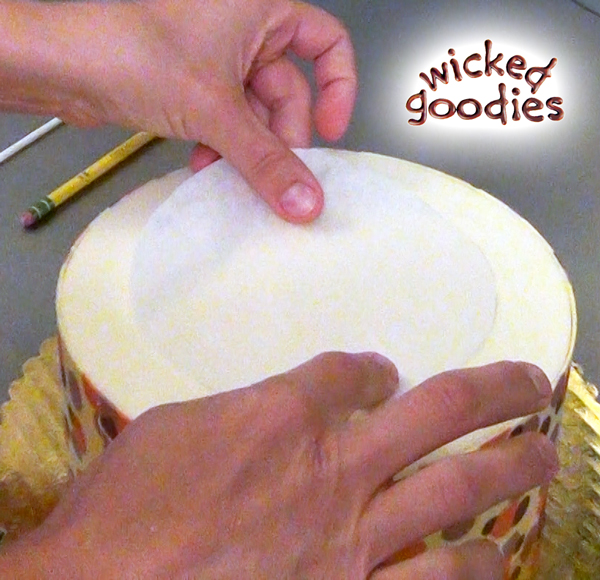
Cut the parchment paper to the same exact size and shape as the base of the upper tier (i.e the one that will get stacked above) as those dimensions will provide you with an accurate boundary for orienting your dowels. When the time comes to place the upper tier down, it will help guide your physical placement of it.
The main purpose of placing a parchment paper liner between stacked tiers is to prevent them from fusing together. When there is no liner, the frosting from the lower tier gets stuck to the cardboard base of the upper tier. That means you only have one shot to place the upper tier down; wherever it lands is where it will stay (not ideal). With a parchment liner underneath each tier, you have more than one shot. You can use your offset spatula to shift, wiggle and adjust the upper tier until it sits in the right place. You can even lift off the tier if you need to make a big fix.
Much later, when it’s time to cut the cake, the parchment liner will come in handy one last time as it will make it easy to pull apart the joined tiers.
How to Use Wood Dowels in Sculpted Cakes
The trick to stabilizing large sculpted cakes with dowels is to consider the weight distribution of each given shape. Wherever the most force will get exerted, that’s where you want to place your thickest supports. Here is an example from start to finish of how four tiers became one giant 3D boat cake with the help of dowels and modeling chocolate. This wedding cake served over 100 people.
Alternative Methods
Bubble tea straws (commission earned) offer the advantage of being cheap and easier to cut than wood dowels. This method is fine for small projects (2-3 tier cakes) but I wouldn’t risk using it on larger stacked cakes, cake transport or any situation that involves movement of the cake. Hollow plastic straws can’t be whittled down to a point, which means they can’t be used to join tiers or lend horizontal support. This is my complaint: their usefulness is limited in scope.
The Separator Plate System, which involves a set of interlocking plastic columns and plates, is the least reliable option I’ve encountered in the bakery business. For one thing, it’s an expensive product for single use (if you can recover the parts and reuse them, it’s a better investment). The peskiest part is the plastic plate, which only comes in handy when the cake has elevated/separated tiers like this white wedding cake with fresh flowers.
For conventional stacked cakes with touching tiers, the plate adds so much bulk that it leaves a gap between tiers. That gap is not easy to hide. Worst of all, the plastic plate gets in the way of inserting long pointed horizontal support dowels through the cake, which means the cake can’t be adequately stabilized. Since you can’t stabilize it, you have no choice but to assemble every tier on site, which is more challenging (personally, I prefer to assemble cakes as much as I can before delivery).
Lastly, the plastic support columns tend to be chunky. They displace way more cake than I feel is necessary. Even the hollow columns, which are easier to work with than the thick kind, are much wider than they need to be. They are so wide, they lower your servings count. In conclusion, I’ve had more problems with this method than any other one I’ve ever tried so I can’t recommend it.

New to Wicked Goodies? Start *HERE*


You might also enjoy


Hi, sorry if I missed this being answered. I am making a sphere cake and have read your tutorial on how to do it, I also came to this tutorial on dowel placement. My question is this… How do you place multiple dowels in the bottom layer, to hold up the top half, without them being seen outside the curve of the bottom half? Will them being close together in the center be enough for support? My sphere will be an 8″ diameter.
Good question. It doesn’t look like I’ve addressed this so I’m glad you brought it up. You may have noticed in the sphere cake tutorial how the bottom half of a full sphere cake is slightly truncated on the bottom to prevent it from rolling. There is a little cardboard circle there for support. That circular area is the “safe zone” for accepting dowels. I would make a little paper template the same size as that cardboard circle then place it on the wider “top” of the hemisphere where the dowels will eventually enter. Trace around the template with a sharp implement to leave a mark. Then you have a parameter marking the “safe zone,” where you know the dowels can enter without poking through at the bottom. It’ll be a tight squeeze so just make sure the dowels are plumb when they enter. Good luck!
Amazing tutorial!
I’ve to do a 7 tier wedding cake. Could you please tell me how thick should a centre dowel be in the lower tier to support the tiers above?
Also, can the two dummy cake support the five tier on top? Will i need to put in dowels in the styro as well?
Kin,
That’s a good question. For a cake that big, I would choose a center dowel that is at least 1/2 inch (25 mm) thick for the lowest cake tier. I would also play it safe and add some dowels to the styrofoam. It might be overkill since styrofoam is quite sturdy all on its own (I don’t normally add dowels to it) but I would do it in this case if only to avoid fretting about the possibility the styro might get compressed, upsetting the finish. I think your situation calls for that extra level of security, both for the cake and for your own peace of mind.
I was curious about whether wooden dowels would support a rising feature. I’m making a snake cake for my daughter’s birthday, and the snake head is supposed to be raised a bit from the “body”. I feel it might be too heavy or wobbly. Would I want a sharpened point dowel and cardboard at the bottom of the cake to try to hammer it in to? Would that even be enough support? Maybe through part of the body of the cake and cardboard? What would you suggest? Love your site!
Shayna,
In the case you describe, a dowel would probably fail to lend enough support to the head. If the project was mine, I would build an extension out of wood. 3D cake artists often refer to the interior foundation of sculpted cakes as the “armature.” I recommend researching that keyword as it relates to cake. You could probably even find photos of an armature made for a snake cake with a floating head.
Thanks! It was my first attempt at ANYTHING like this. I winged it. I didn’t get to finish the way I wanted (timing was off for this project), but I’m proud of my first crazy cake. And my daughter loved her (cobra). Next time I’ll definitely have looked into armatures… and give myself a bit more time. Thanks again!
P.S. Is there a better way to color modeling chocolate deep, dark colors? I tried to do a deep red cobra, but I could only get pink, no matter how much red I added. Regular, gel, powder coloring; nothing helped.
Hey that cobra head of yours came out great. Nice work winging it! After checking out how you created the coils and neck, I zoomed in on your faces, which made me smile. The photo captures such an incredible moment in time. Thanks for sharing it!
The trick to getting a dark red colored modeling chocolate is to use super red liquigel plus corn starch to offset the added moisture. Wear rubber gloves and knead the wet and dry all together. Alternatively, paint it on. I’ve got a tutorial on that here: How to Paint Modeling Chocolate.
I watched your video a couple of times and then all of a sudden I woke up this morning with a startling thought. How do I know where to place the horizontal support dowels so they don’t hit the vertical support dowels?. I watched your video again and I’m thinking you must align them when you put the top-tiers on. And then I think you also have some kind of sticker marking which section is 12 o’clock? Please advise
No need for a visual aid. The trick is to insert the long pointed dowels closer to the center of the cake, avoiding the perimeter occupied by the vertical supports.
Thanks for your help!
Wow, Sally! What a spectacular cake. It looks totally stable and I’m especially impressed by your fine painting job. BRAVO.
Thanks Kristen! But I didn’t actually hand paint them. I made stencils with my cricut machine and I airbrushed them.
Cool! I would never have guessed that’s how you did it.
What a clever use of the Cricut machine! Thanks for sharing the inside scoop.
Hi wonderful informative tutorial on cake construction.
Im making an LOL Surprise polka dot inside birthday cake for my grand daughter. cake consists of 10 inch square cake bottom with a 8 inch sphere centered on top. Planing on leveling cakes and torting assembling using rasplum jam and vanilla buttercream. Can you suggest any specifics to ensure cake comes together without any problems.
Toni,
Check out this tutorial on How to Make Sphere and Hemisphere Cakes. At the bottom of that page, check out the comment from Elizabeth Adinolfi with photos of how did she did what you described using a system called Cakestackers. I have not tried it myself but it looks decent and possibly worth the investment if you use the system over and over again.
I am attempting to make a computer cake and would like to include the screen. How do I attach the screen to the cake?
Can I do so using dowels and skewers. This is my first time attempting this. Thank you for your assistance.
Also should the screen be covered with fondant or can I use butterflies frosting?
I was browsing and found your site,
I decorated a cake like this once many years ago. The keyboard part of the laptop was the cake. The screen part was just a thin piece of wood covered in fondant. It was attached to the base (also made of wood) and if I am remembering correctly, the screen was tilted back slightly, which helped prevent the fondant from slipping down. I think I used something sticky like corn syrup to get the fondant to adhere to the tilted piece of wood. I recall it was a rather challenging project. Good luck!
Do you use white medical tape or white duct tape on edges of Cake boards?
Hello,
I’m wondering about supporting a tall cake…it will not be tiered, just several layers so that it is tall. I’m using 8″ pans and plan on 6 layers of cake. Should I just add some bamboo skewers to it, or do you think it will be fine on its own since I’m not tiering the cake with another? THANKS AGAIN!!!
It wouldn’t hurt to add one or two skewers down the middle or if it’s really tall, add some infrastructure as you would with a 2 tier cake. I would base my decision on how far the cake has to go and how long it will be on display. It wouldn’t hurt to err on the safe side.
Do you always just use one cardboard cake board under each cake, even for bigger layers. Will just one cake board hold up? Thanks,
Good question. No, I don’t always use one. For larger tiers, like 12″ or wider, especially if it’s square, I sometimes use two. It depends on where the tier lies in the cake – how much weight is going on top of it. It depends on the thickness and quality of the cake board – if it’s single or double ply, if it’s glossed/coated or not. It also depends on the type of cake – if it’s really moist, then you want to double up since a single cardboard is more likely to get soggy and sag, especially around the edges.
Sometimes I add extra cardboard just to even out the height of the tiers if they are off and it matters visually that they be the same exact height. The problem with super thick cardboard though is that it’s more difficult to pass the pointed horizontal support dowels through it. The trick in that case is to insert those dowels and pound them through before stacking that tier onto the cake. It’s a matter of holding the cake over the edge of the table so the point can pass through, then pulling it back up flush with the base.
I am making my first grooms cake and it is 3 layers. This is my first wooden dowel experience. I will be doing the dowels for each layer with the cardboard that the layer is sitting on, but my question is when you push a small dowel through the layers, will it go through the cardboard layers? Help I am nervous.
No, it shouldn’t go through (unless it’s a pointed horizontal support dowel). Be sure to insert all the vertical support dowels before assembling the cake.
I understand that between each layer you have 4 dowels and each cake is on cardboard but when all the layers are put together do you run a longer dowel the length of the cake through all the layers?
I would probably do it like this: In advance of transport, secure the #1 base tier to #2 using two long horizontal support dowels. Also secure #3 to #4 with two horizontal support dowels so that the cake becomes only two parts (2 + 2). At the event, slide the top duo onto the bottom duo. No additional horizontal support is needed at that point if the cake looks level is not due to be moved again.
When doweling a cake, do you cut your dowels all the same length? Thanks
Yes, unless it’s a topsy turvy cake.
Great tutorials, No mention is ever made about dowels or piping on how to clean them before using them. I’m assuming they should be sanitized in some way before use.
Judy,
I’m not sure if sanitizing dowels is a necessary step. Although you bring up a good point here, I have never worked at a bakery that sanitizes dowels before use except in cases when a piece of infrastructure gets used more than once. Wood is naturally anti-bacterial so it is resistant to transmitting the types of harmful food-borne pathogens that you might be thinking of. Plastic is more worrisome as unlike wood, bacteria can multiply on its surface. So when using plastic infrastructure, always sanitize.
It does help to wash dowels after sanding them down to get rid of any loose wooden particles that may be clinging to the surface.
Great advice … I have been in the bakery business and I appreciate your honesty and sharing …
Wow…this was extremely helpful. I have to do a two tier cake and I did not have a clue on how to stack it or how to use dowels. 2 thumbs up for Wicked goodies
Hi, I’m hoping you can help me with a question. I’ll be working on the largest cake I’ve ever made. It’s an 11×15 sheet cake, two-layers per layer, with a rice crispy treat roof (it’s the shape of a house I’m making) what sort of dowels should I use for each layer and should I have one or more dowels going through the whole cake? I’m really nervous that the cake is going to collapse onto itself. Any recommendations are greatly appreciated.
Sorry, the cake is going to be 4 double layers tall with about 4 more layers of crispy treat roof on top and fondant on the very top of the cake.
Hi,
Yes it would make sense to use wood dowels in that case. For an 11″ x 15″ house cake, I would put 6 dowels in 2 rows of 3, at least 2″ away from the sides all around, as the majority of the weight of that roof will be in the middle. Make sure to put a cardboard on the bottom of the rice treats as it will be heavy including the fondant. If the cake is being transported, I would also suggest inserting 2 pointed dowels through the roof into the cake to prevent the roof from sliding.
Su trabajo esta muy bonito
Hi, I love your site. Thank you so much for sharing your knowledge. Your tutorial are so helpful. I have a question, when doweling a topsy turvy cake should the dowels be cut at an angle ?
Yes they should be cut at the same angle as the cake.
Hi, I just stumbled upon your website researching info about modeling chocolate. I am so impressed, and I must buy your book! 🙂 I had a question, I cannot seem to find it anywhere on the internet.. I am considering covering my entire cake in modeling chocolate, however it will be outside in a hangar (military ceremony) for a couple of hours…. We are in CA in the high desert area and do you think the chocolate will hold up to heat, the weather here is so iffy I mean today it rained and snowed… who knows what it will be like next week. lol Thanks so much!
As long as the inside of the cake is stable, it should hold up in the heat. Just make sure it is kept in the fridge up until delivery and not displayed in direct sunlight. Good luck!
Hi, I love your site and thank you so much for sharing all this information. Just wanted to let you know the Amazon link for the Woodsies dowels pack state they are “Birch wood, non food safe”. Many thanks! Can’t wait for your book to come out! xoxo
Hi and thanks for your feedback. I’ve since changed the link but believe that birch wood is okay to use as long as it’s natural and untreated!
Actually stumbled on your site, while searching for info on modeling chocolate. Your tutorials are simply amazing :- details, pictures and the “converted handy cake tools”. Thank you for sharing your knowledge.
Another question, how many cardboard circles or squares are you taping together?
If it’s thin cardboard, I might tape together two pieces but otherwise, I use only one piece of cardboard per bottom of cake tier.
Your frosted cakes are so perfectly sharp. Do you have a tutorial on how to do that? Thanks for all you do!!
Yes, in my upcoming book, there is the recipe and instructions for how I frost cakes using American style buttercream.
Fabulous tutorials!