
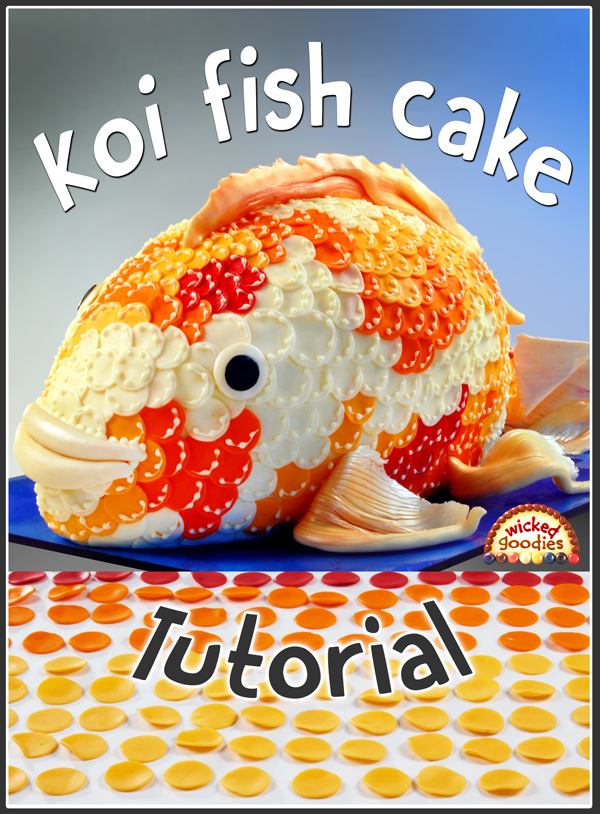
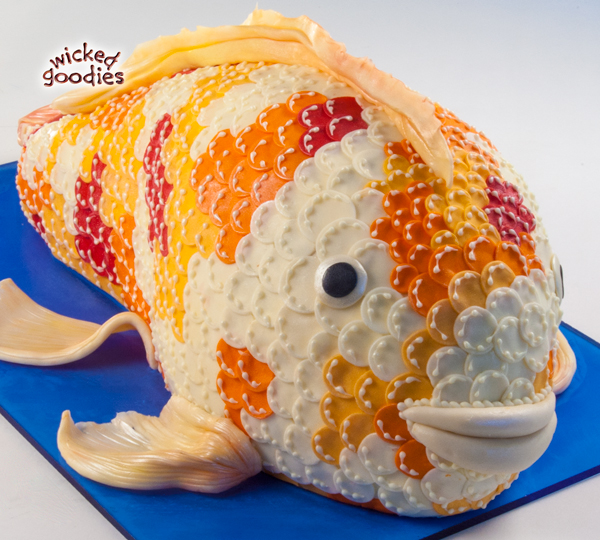
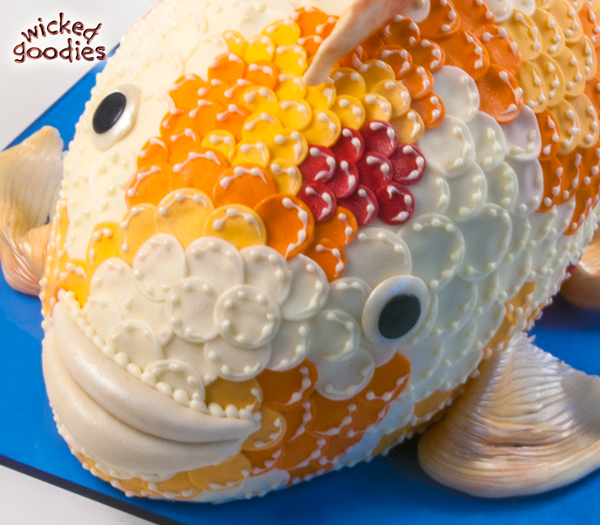
This alternative wedding cake is finished in rolled modeling chocolate and piped chocolate. It was for a couple whose reception took place in Balboa Park’s Japanese Friendship Gardens, which has a zen rock garden and koi pond full of plump, spotted fish. The groom asked for a fish that had movement and artistry to it. Here is how I fulfilled his request.
1. At a plastics shop, I ordered a piece of blue-tinted, 1/4″ (~ 6 mm) thick plexiglas for the base of the cake for a translucent water effect.
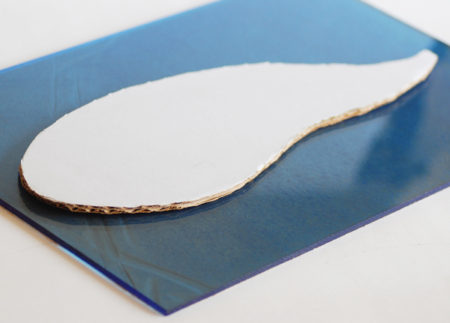
2. I cut a corrugated base in the shape of a moving fish body to fit the platter.
3. Meanwhile I baked off a half sheet cake. I created a red velvet cake with many layers of strawberry cream cheese frosting because the groom requested that the cake’s interior resemble sashimi.
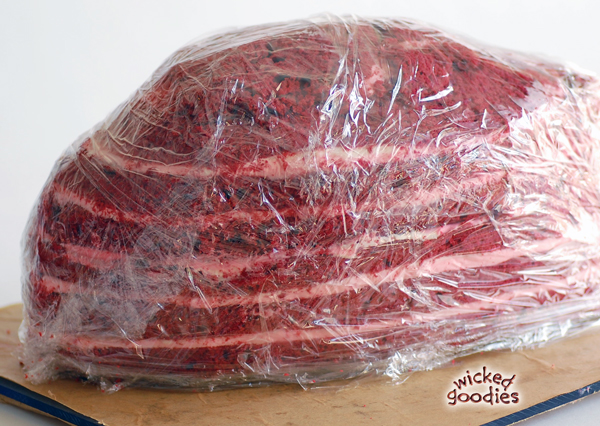
4. I carved the cake out of the half sheet until it resembled a curvy fish body the length of the precut corrugated base.
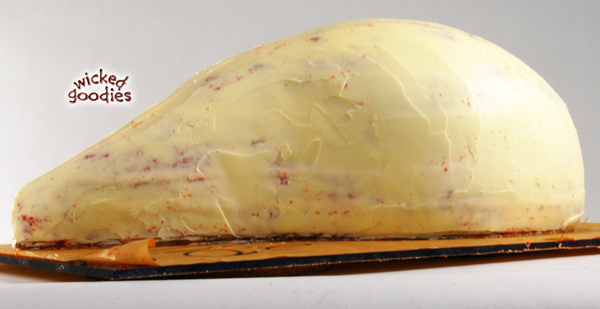
5. I crumb-coated the cake in buttercream frosting.
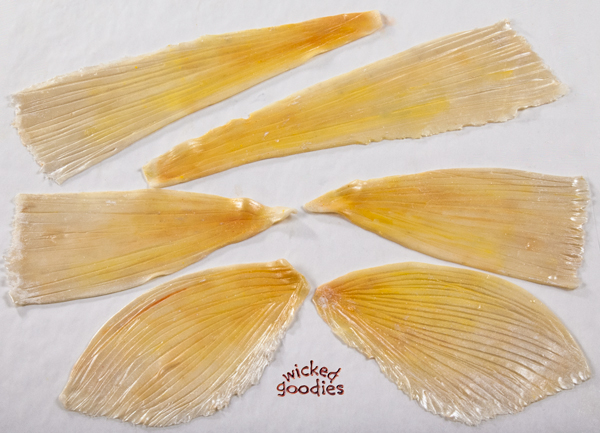
6. I made eyes, tail parts, and fins out of modeling chocolate.
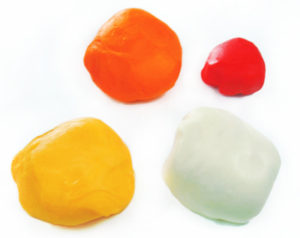
7. To make scales, I tinted modeling chocolate light orange, dark orange, and yellow-orange:
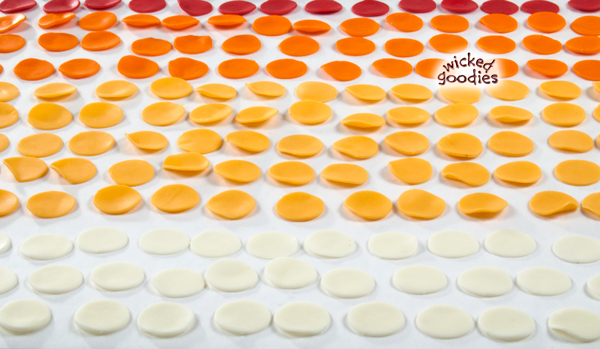
8. I rolled out the modeling chocolate colors to 1/16″ (1.6 mm) thickness then punched out circles with a small round cutter.
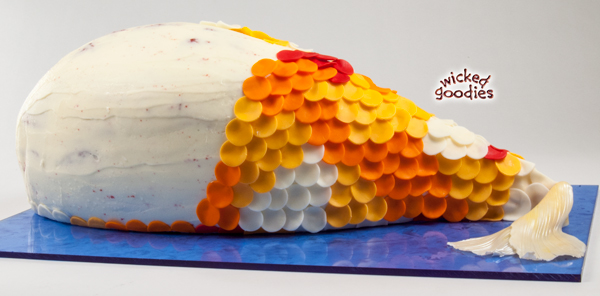
9. I began laying down modeling chocolate circles like shingles from the tail to head, clustering like colors together for spots. I started each row at the base of each side and worked my way up so that each row met in the middle at the spine (the seam was eventually concealed by a back fin).
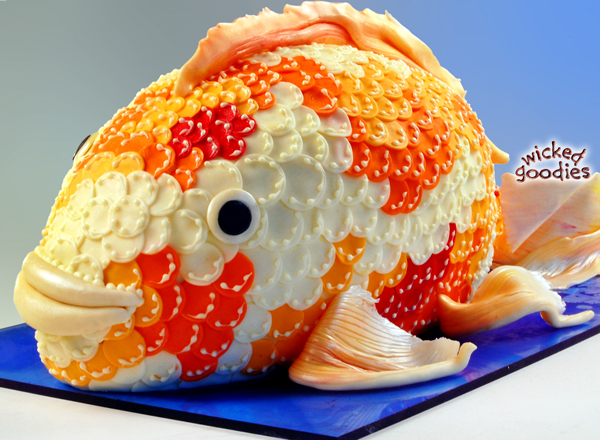
10. Once all the modeling chocolate scales were down, I piped a white chocolate frill around each one.

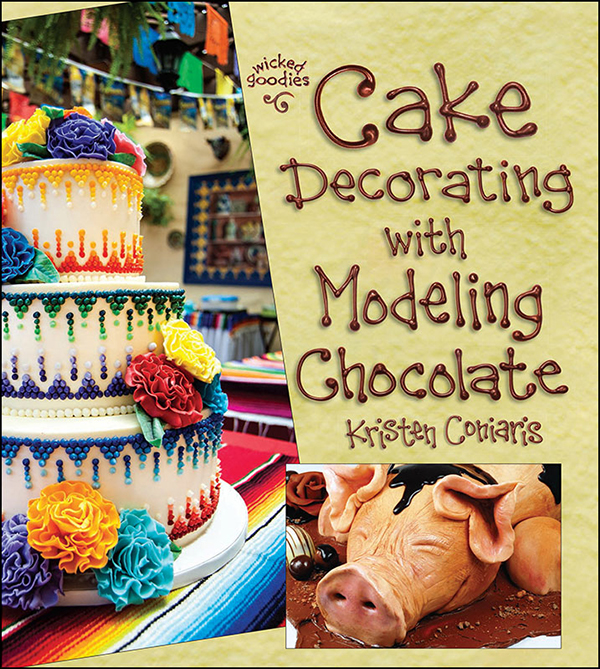
The complete tutorial on how to make this cake is in the following book:
Cake Decorating with Modeling Chocolate


New to Wicked Goodies? Start *HERE*


Smooth Buttercream Cake Frosting

 Owl Cake Tutorial
 Pig Cake Tutorial
 Modeling Chocolate Tutorials

Well I sincerely enjoyed reading it. This post offered by you is very constructive for proper planning.
Would it be okay to post a pic of your fish cake on Facebook in response to a debate amongst people as to what constitutes a fish cake?
Sure. Just please don’t crop out the watermark. Thanks.
Thanks, jill