
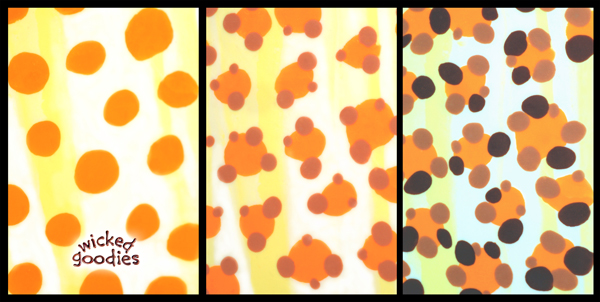
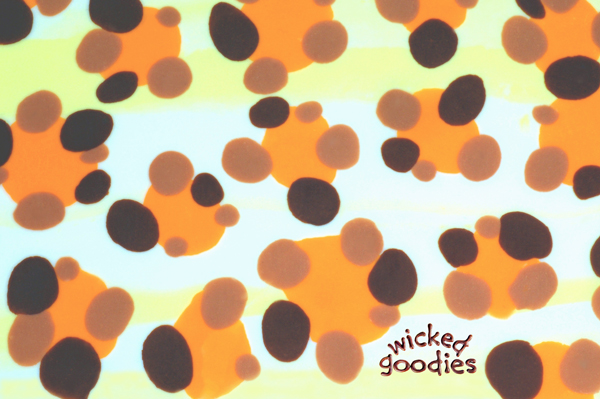
The process begins with a rolled panel of white and yellow marbled modeling chocolate. Orange, light brown and dark brown spots are then added in clusters.
Video: How to Make Leopard Print Modeling Chocolate
In the above video, I used round plunger cutters to make disks. I also split up the process into stages. I have since discovered a quicker way to accomplish this pattern. You can simply ball up little pieces in your hands then press them into the marbled modeling chocolate. All the colors may be added at once before being rolled flat with a rolling pin.
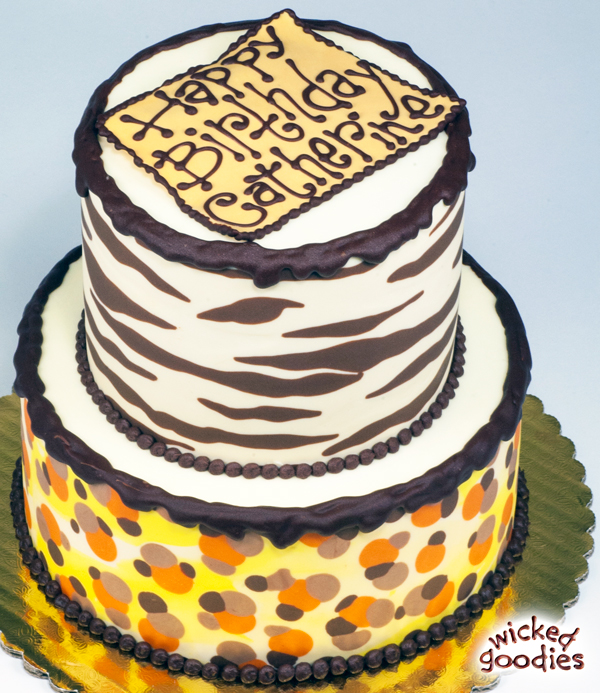
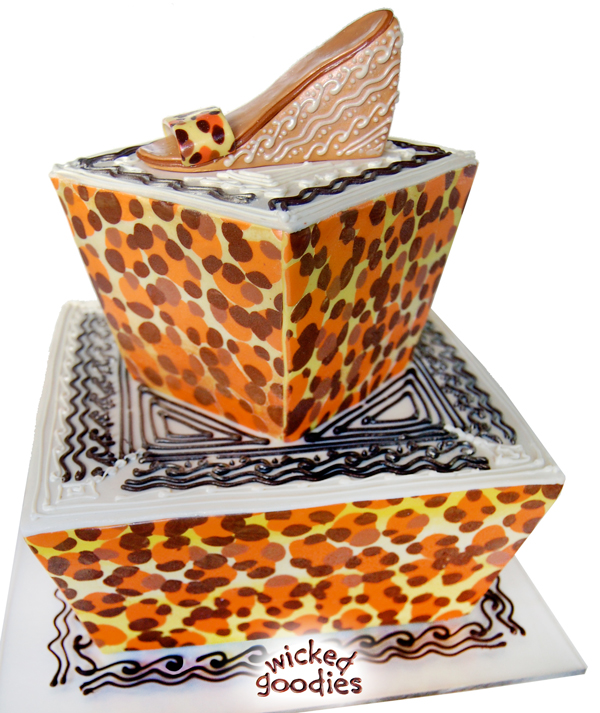
Modeling Chocolate Animal Print Cake Wrap
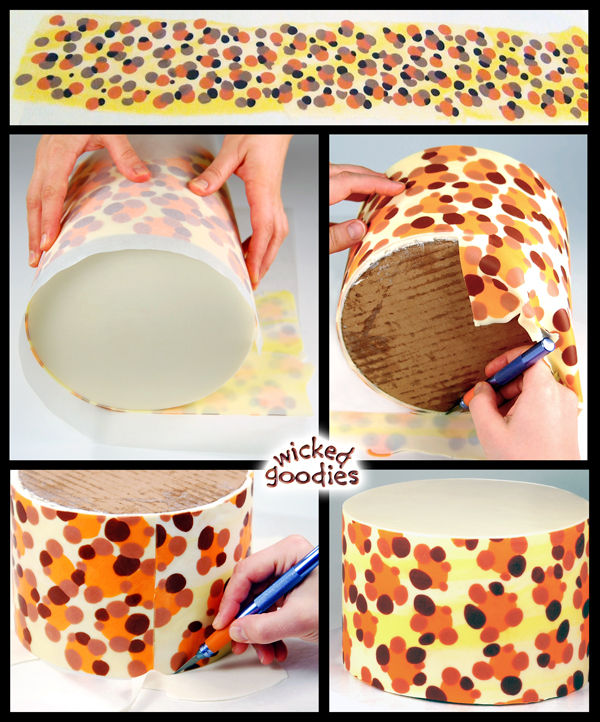
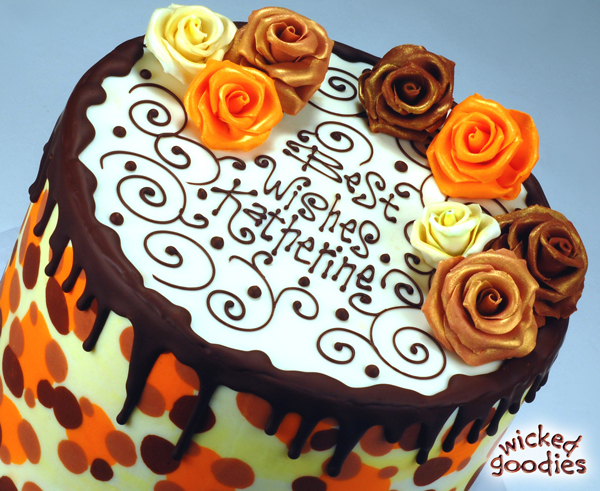
Here are some photos of cakes that have been wrapped in animal print modeling chocolate. This book includes step-by-step instructions on how to wrap a cake in modeling chocolate: Cake Decorating with Modeling Chocolate.
VIDEO: Chocolate Dripping Effect
VIDEO: Piping with Parchment Paper Cones

New to Wicked Goodies? Start *HERE*


Sample the book
Cake Decorating with Modeling Chocolate

Get my FREE recipes and technique for crisp frosting here:
Smooth Buttercream Cake Frosting
 You might also enjoy
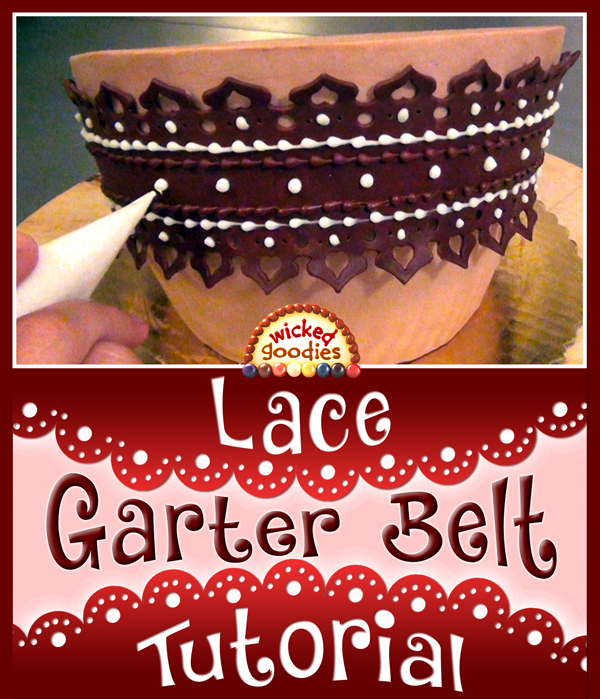
VIDEO: Modeling Chocolate Lace Garter Belt Tutorial
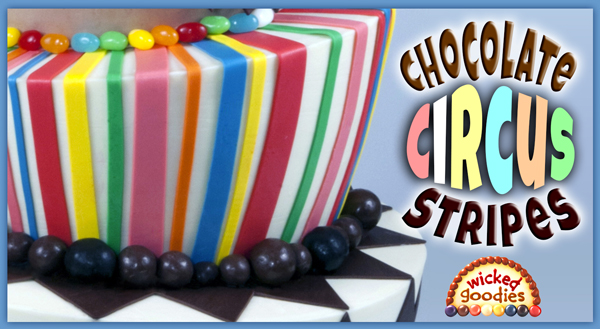
VIDEO: Modeling Chocolate Circus Stripes
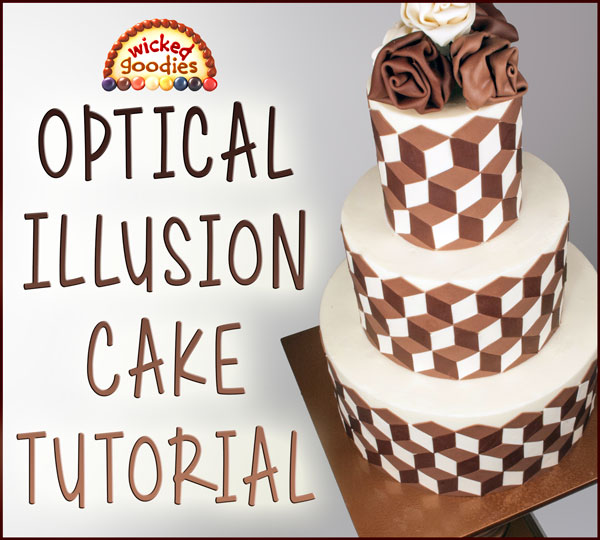
VIDEO: Optical Illusion Cake Tutorial
Do you freeze your cake before you roll it in the modeling chocolate? It seems so sturdy!
When rolling cakes onto modeling chocolate, I make sure they are either semi-frozen or very well refrigerated. I use this buttercream frosting, which gets very hard when cold.